Sign In with Apple Configuration
Step 1. Register a new identifier.
(i) Log into your Apple Developer Account After logging in click "Certificates, IDs & Profiles"

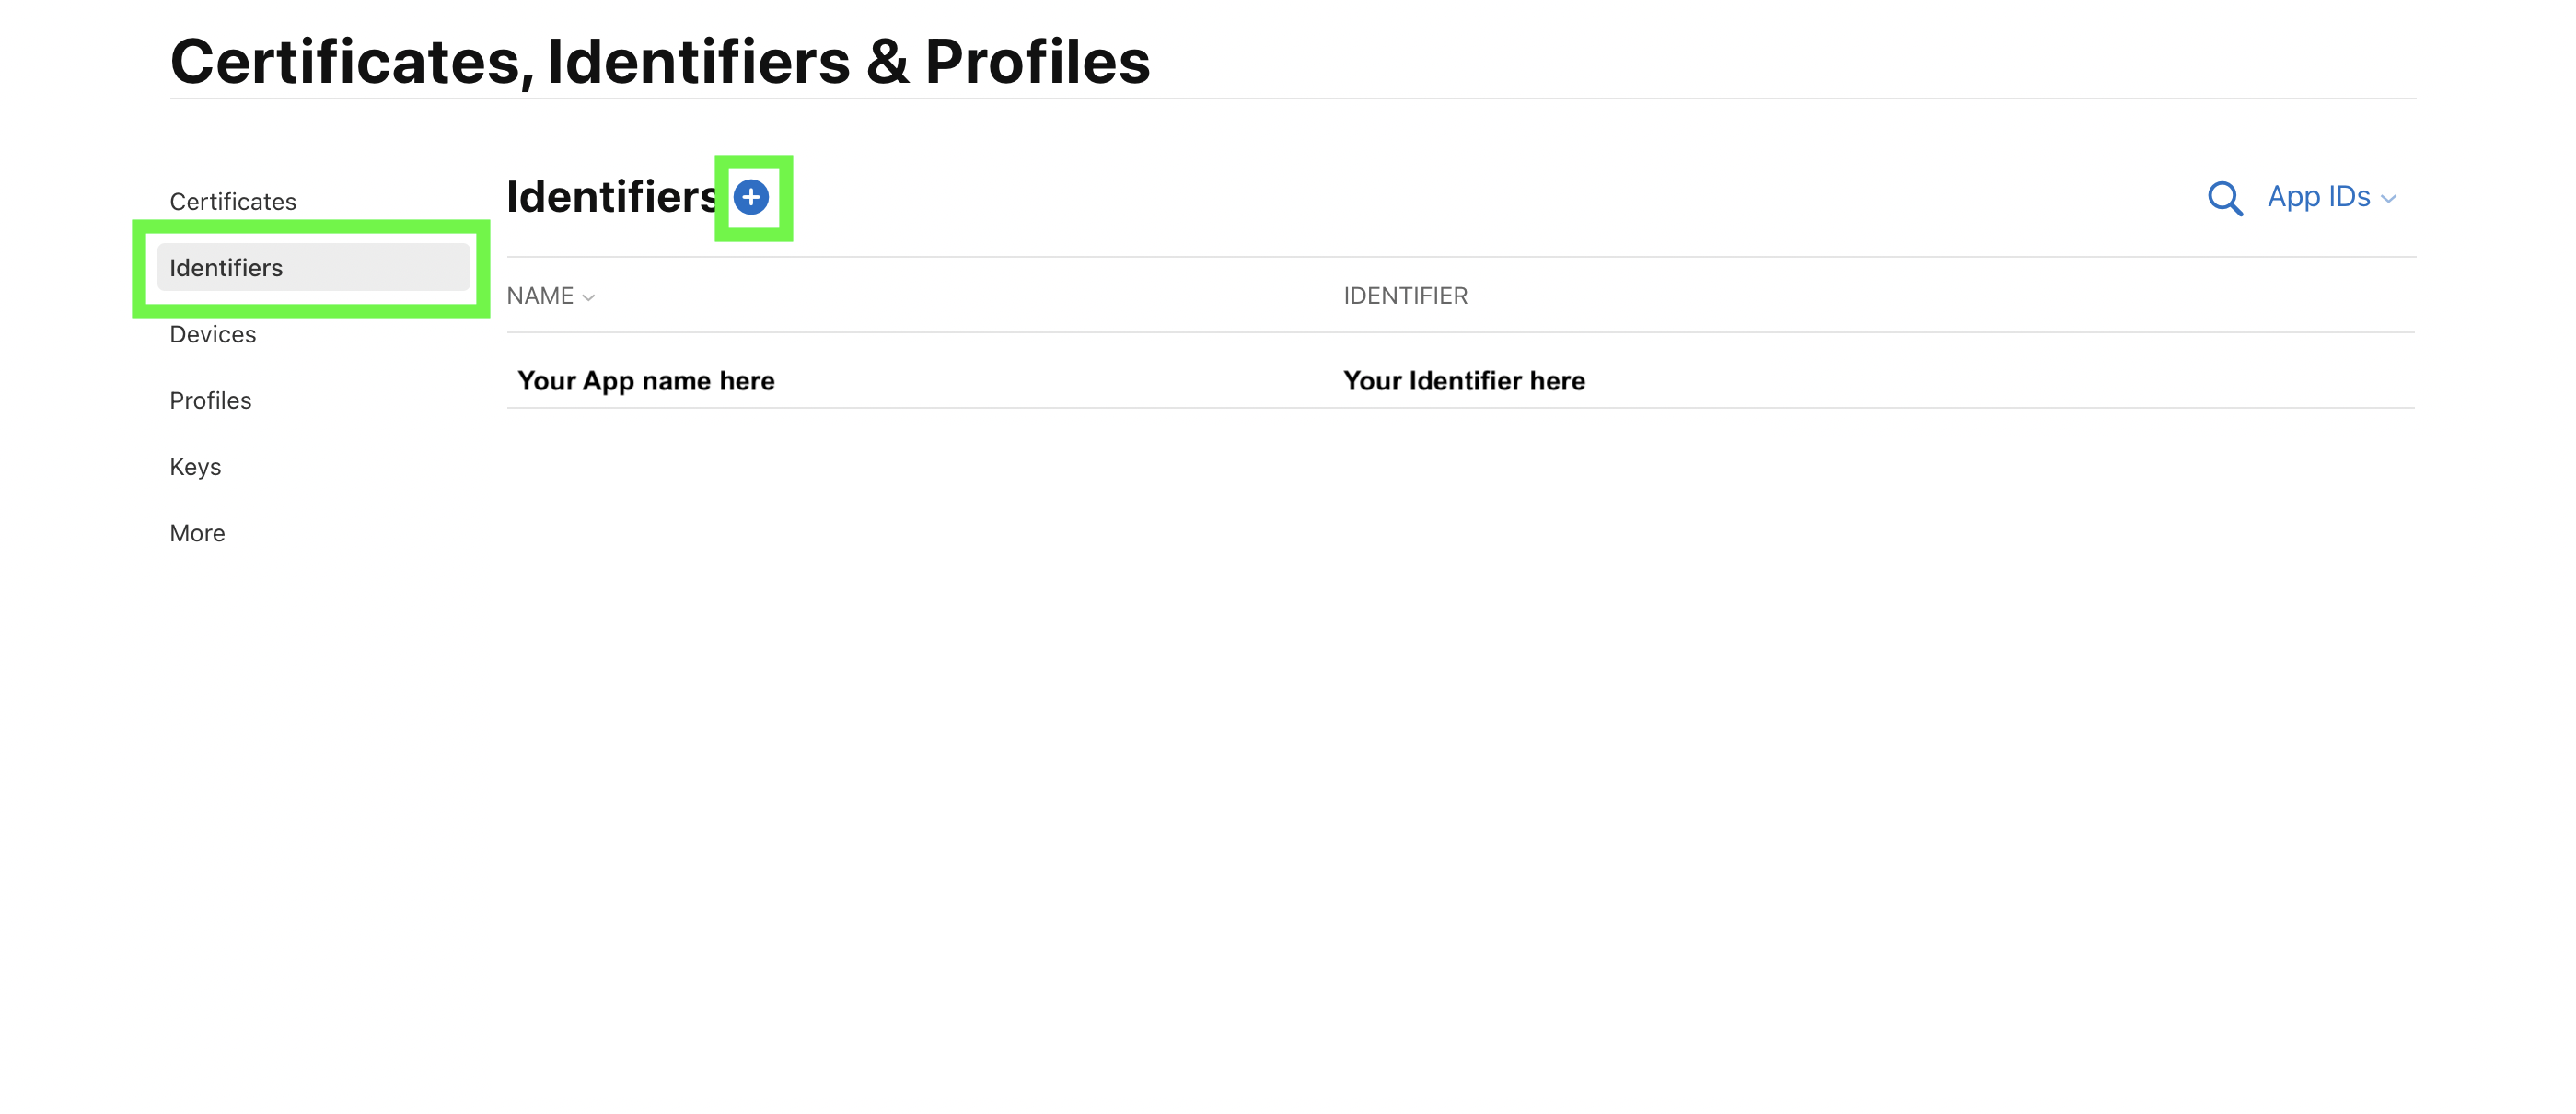
(ii) Then in the left nav bar click "Identifiers" and then the "+" button to create a new identifier.
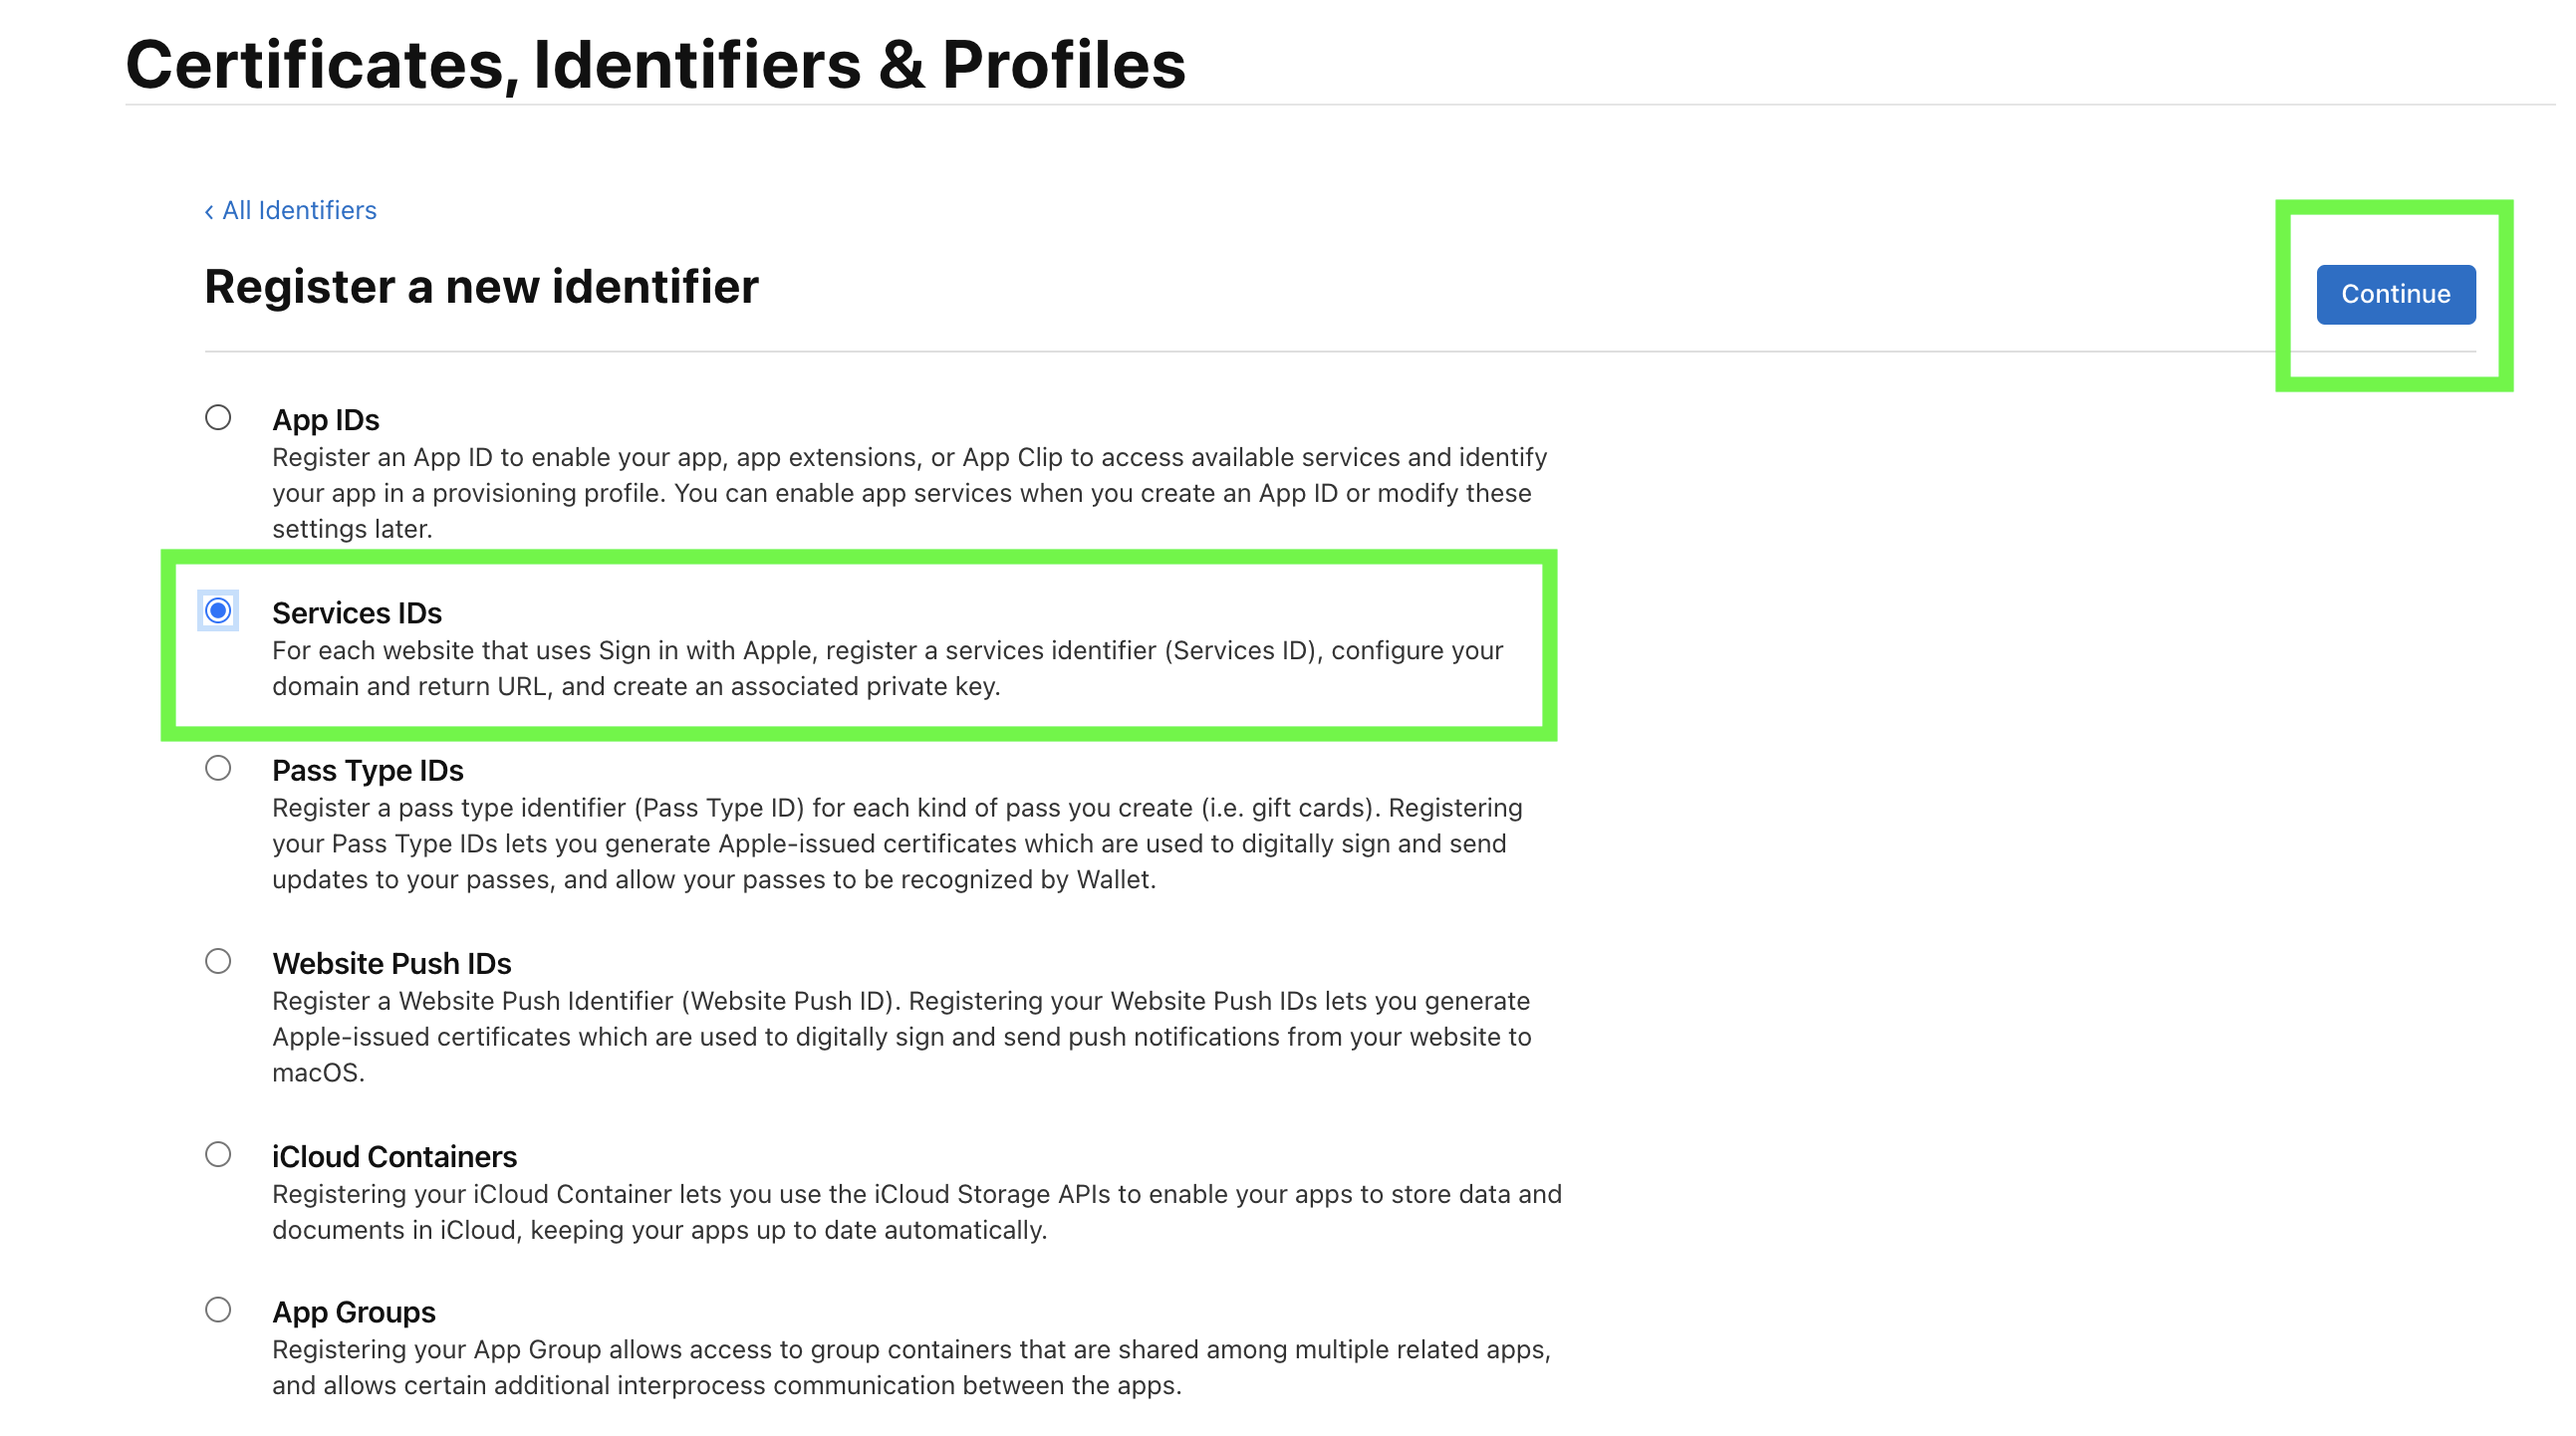
(iii) Select service IDs then Continue
Step 2. Add your app Identifier (Client ID)
Add your app description and your app identifier, which will be the client ID. Press continue and then register.

Step 3. Configure your app identifier
Select the identifier you just created and click "Configure" as shown in the green boxes in the images below.

Click your identifier
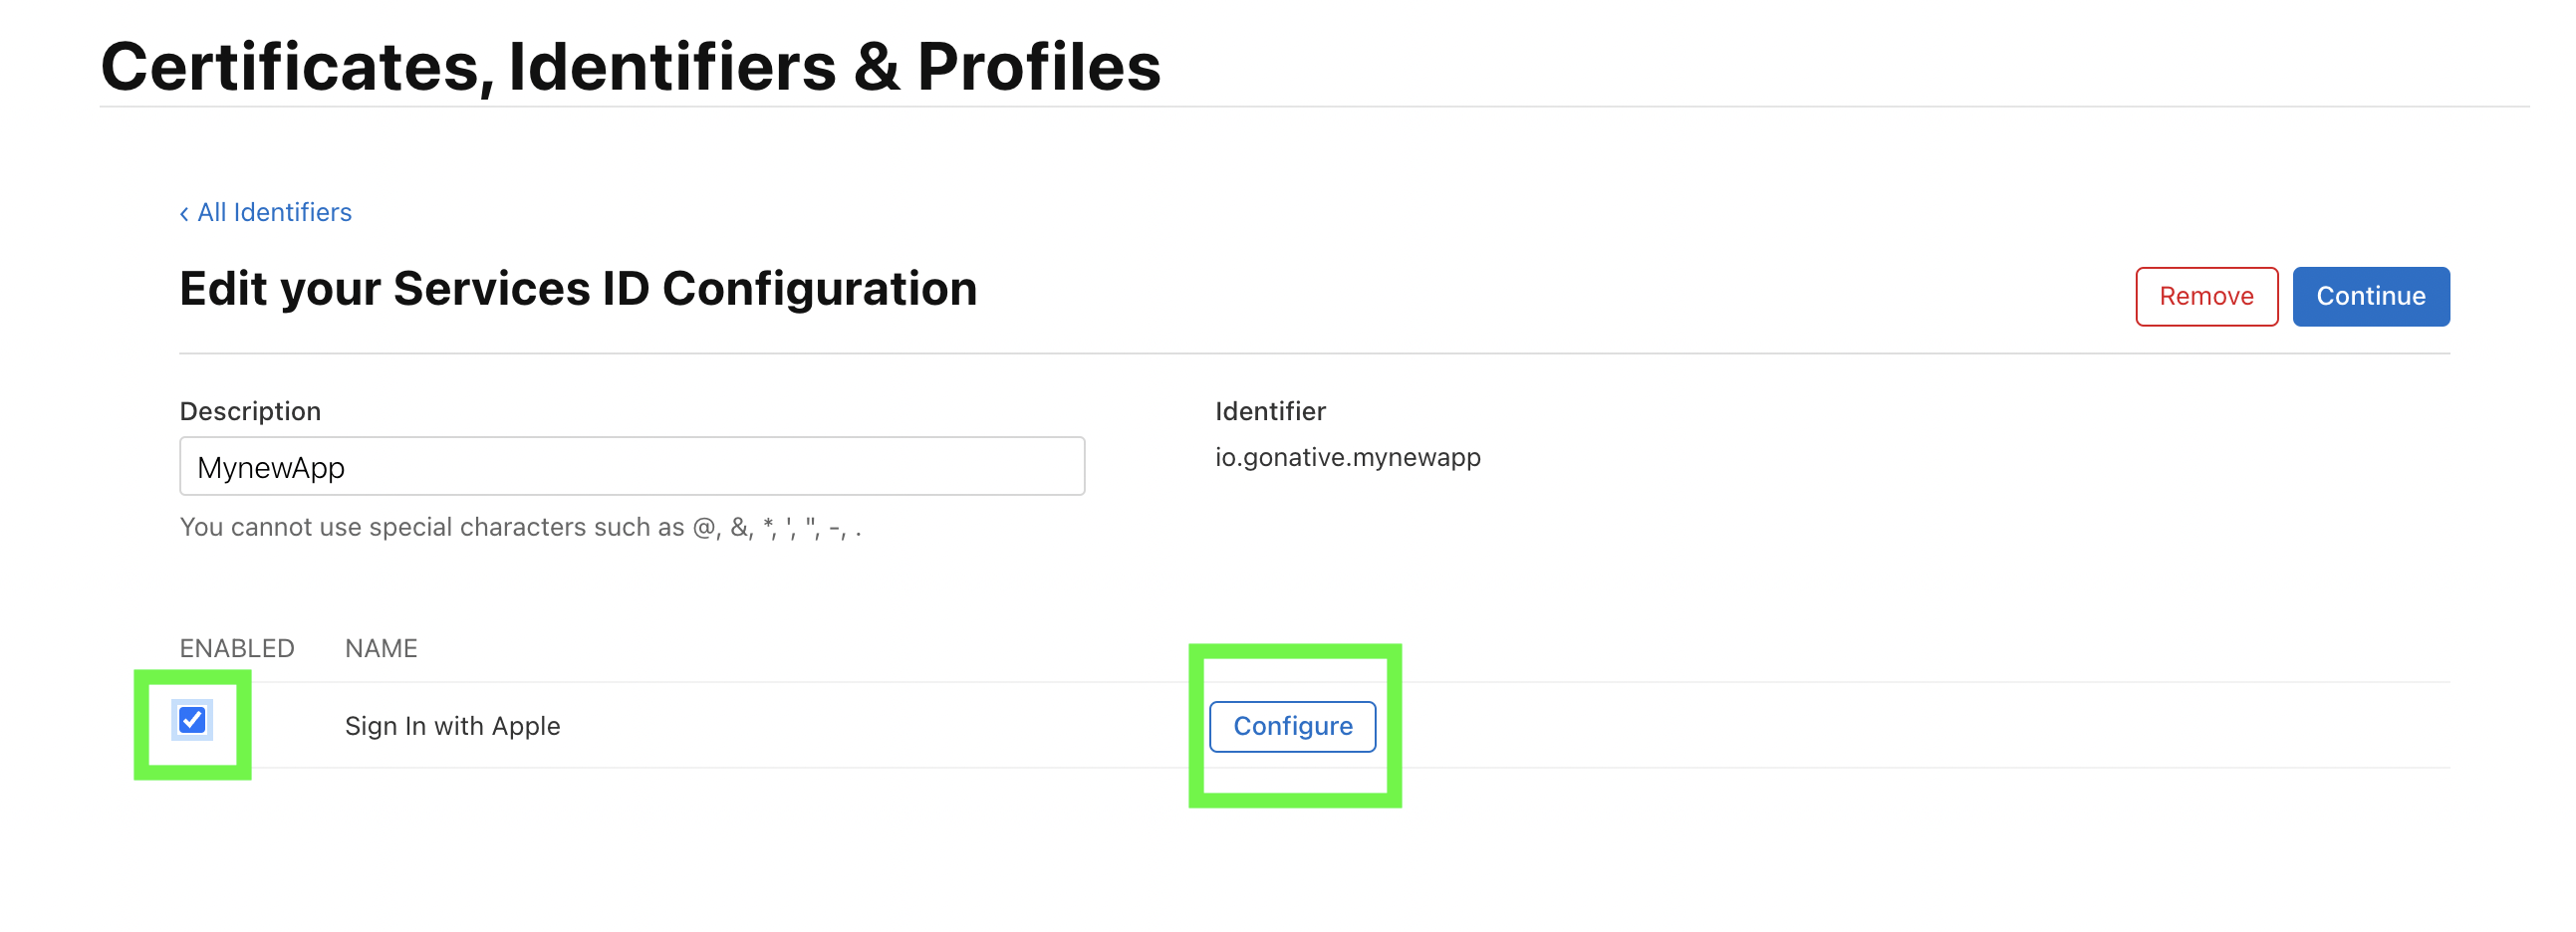
Check the box and click "Configure"
Step 4. Select the primary app ID and add all permitted Domains and Subdomains, and permitted Return URLs
Note that the Domains and Subdomains should not start with https:// or include a trailing /
e.g. only enter subdomain.yoursite.com
Click "Confirm" and then "Done".
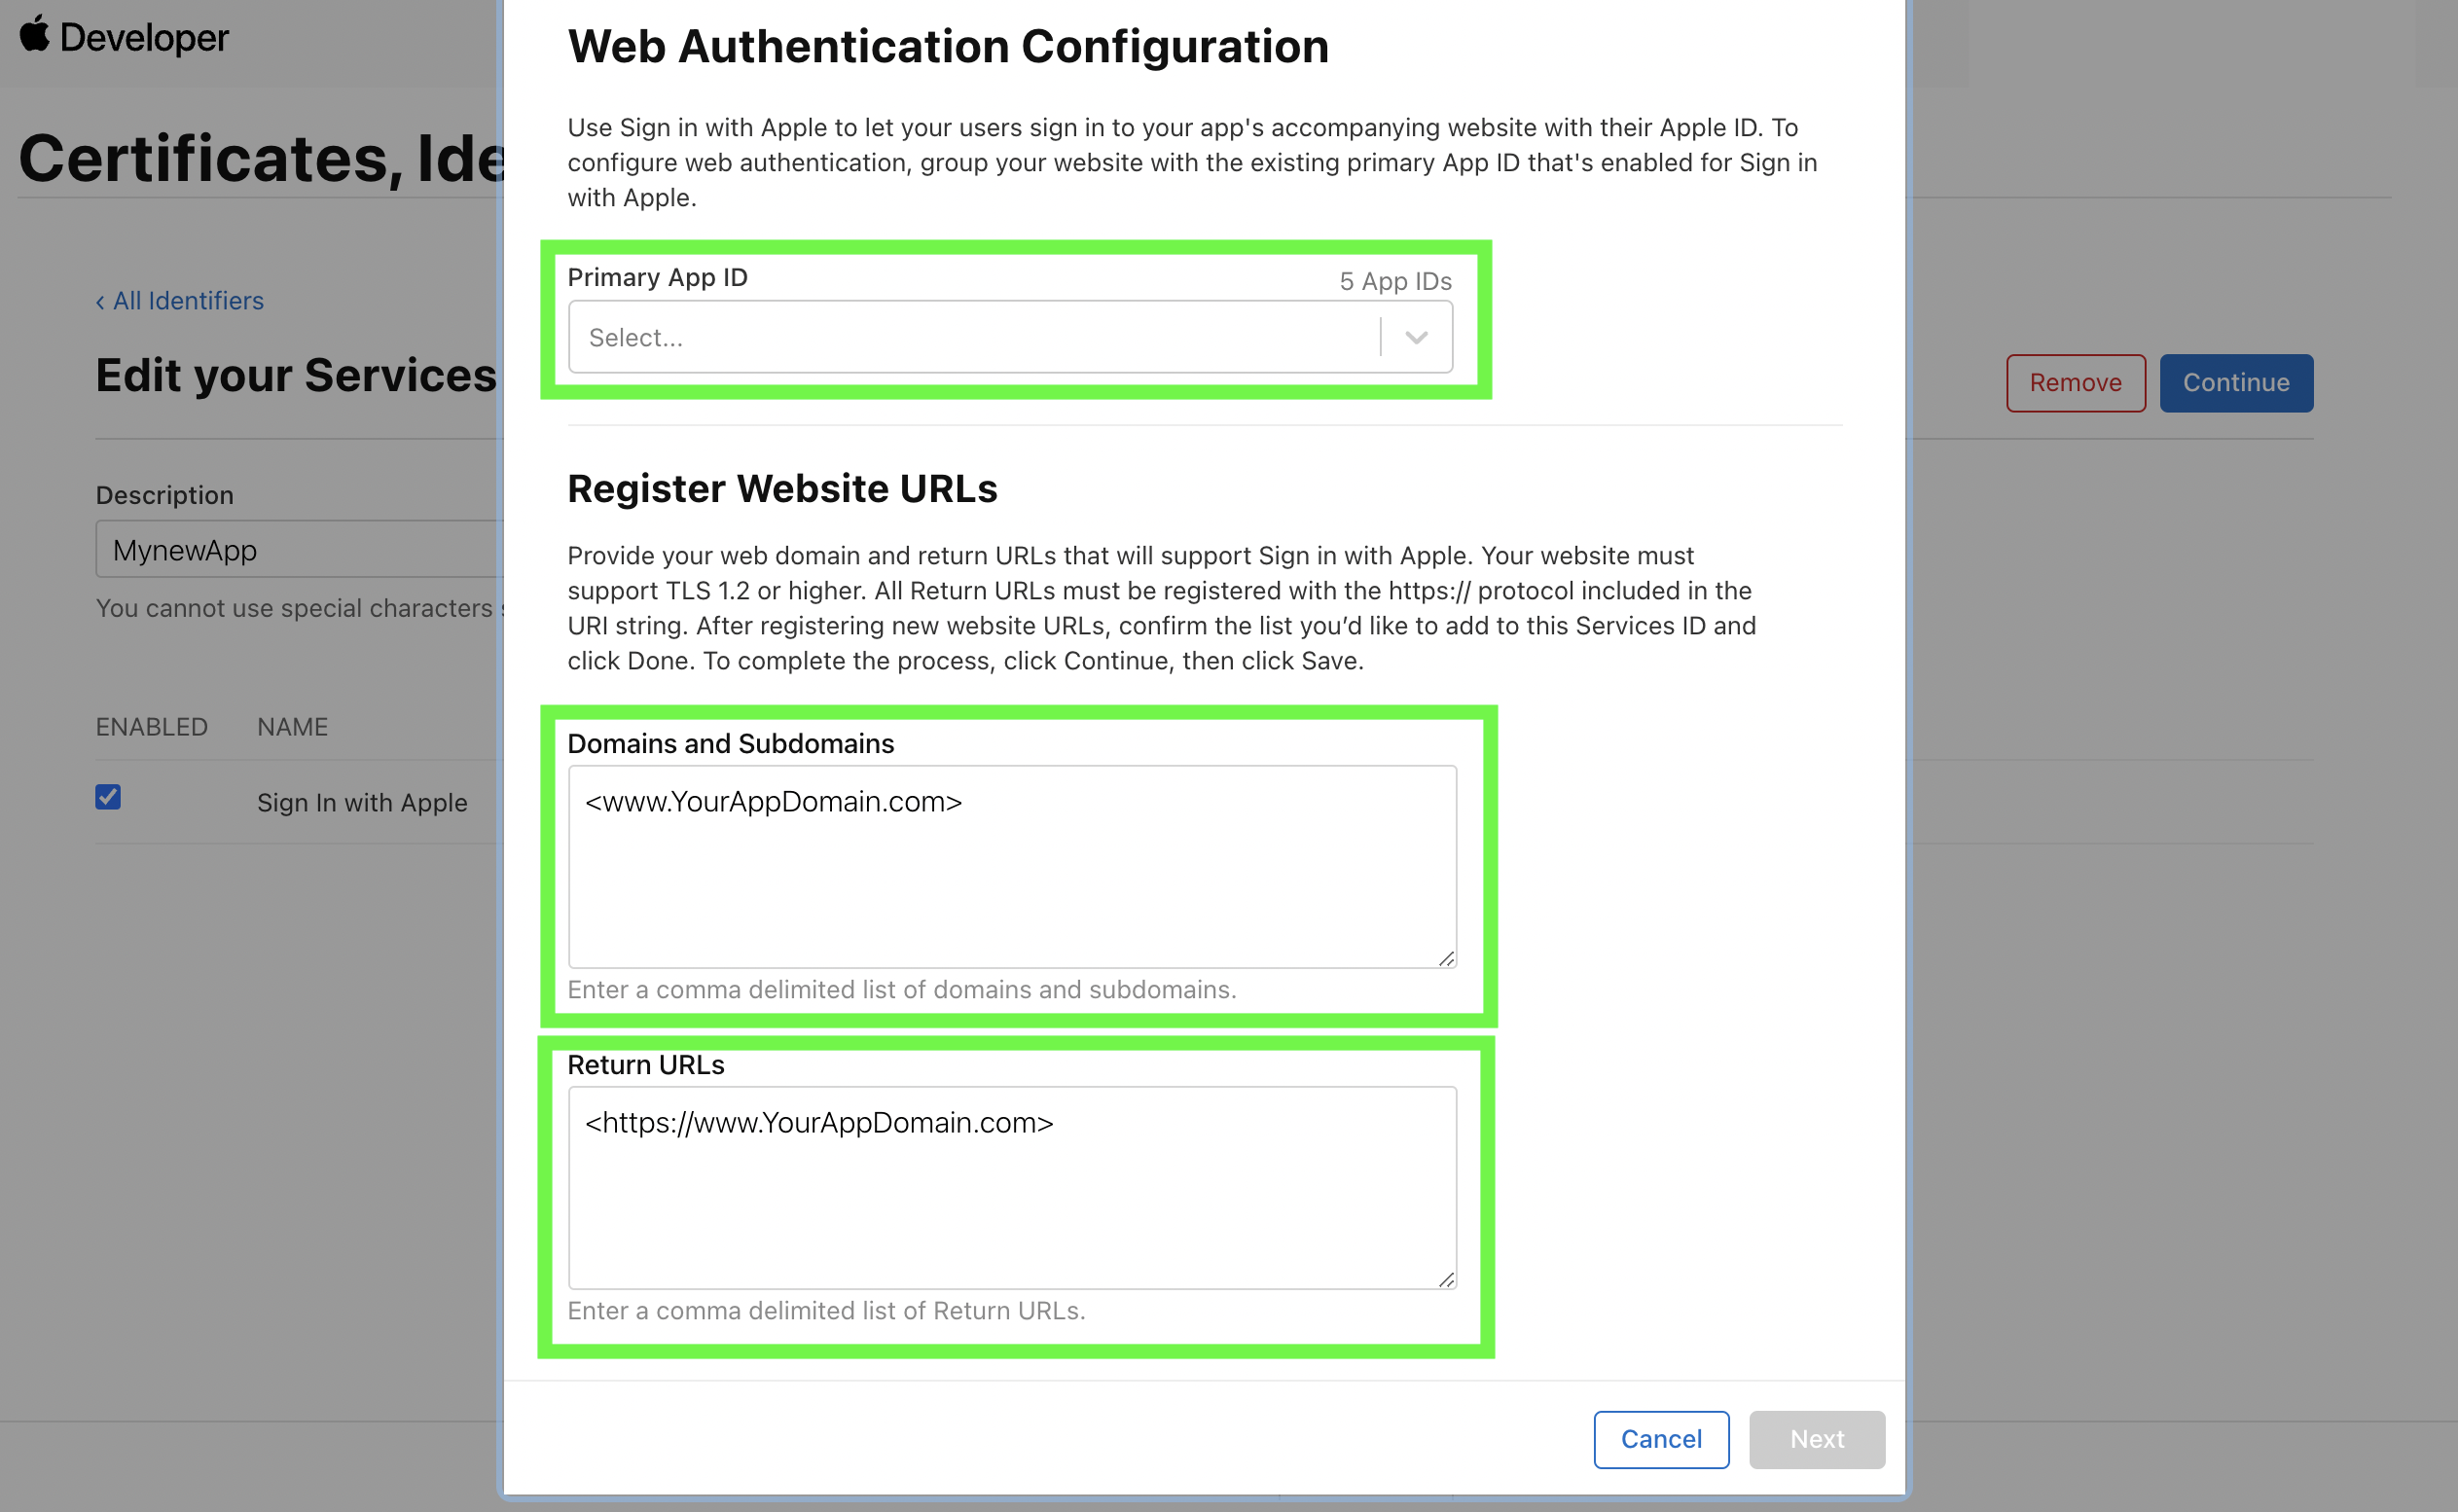
Select a primary ID and add Domains and Return URLs.
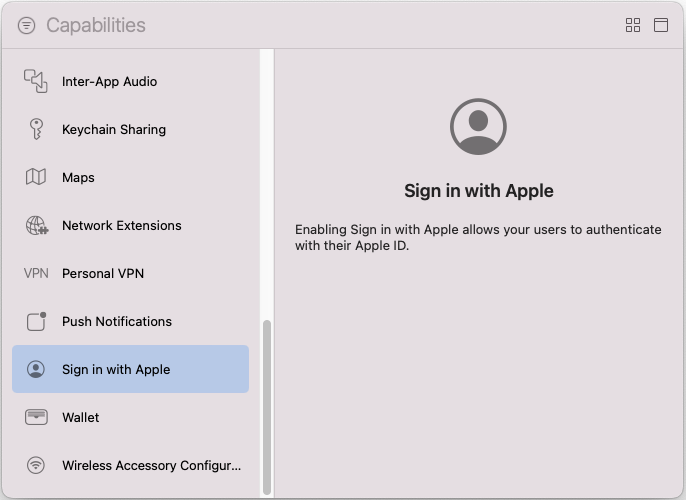
Step 5: Add the Sign in with Apple Capability
Within your XCode project open the Signing & Capabilities tab and add Sign in with Apple
Error Code 1000
Failing to add the Sign in with Apple Capability can result in the following error:
Error Domain=com.apple.AuthenticationServices.AuthorizationError Code=1000 "(null)"
Step 6: Testing
If
email: nullis received then reset Sign In with Apple sessionApple only returns the complete user profile for the first initial login by a user. Subsequent logins to your app using Sign In with Apple from the same Apple ID will only return
idTokenandDuring testing you may reset the login session for your test account to simulate an initial login and return the complete user profile. To do this login in to your Apple account at https://appleid.apple.com/account/manage and go to "Sign in and Security" > "Sign in With Apple". In the window that opens click your app and then select "Stop using Sign in With Apple". When you now use Sign In with Apple in your app again a new session will be created and the complete user profile will be returned for you to process and save.
The aud field included in the parsed idToken is the app's bundle ID. If you are verifying the idToken for a user, you can verify that the aud field matches your app's bundle ID.
Updated 5 months ago