
Build Android from source
Install and Setup Android Studio
You must first set up your local Android development environment. This involves downloading and installing Android Studio along with required Android SDK packages.
Download latest Android Studio at https://developer.android.com/studio#downloads.
Follow the steps in the Android documentation making note to follow the Setup Wizard and install all recommended SDK packages: https://developer.android.com/studio/install.
Android SDK Platform
In the Android Studio Setup Wizard, be sure to select and install all components including
Android SDK.
With your local development environment ready follow the below steps to download and build your Median app.
Download Android Source
Download the Android Source code from your app's private management page by opening the “Build & Download” tab and clicking the “Download Source” button under Android as seen in Figure 1:
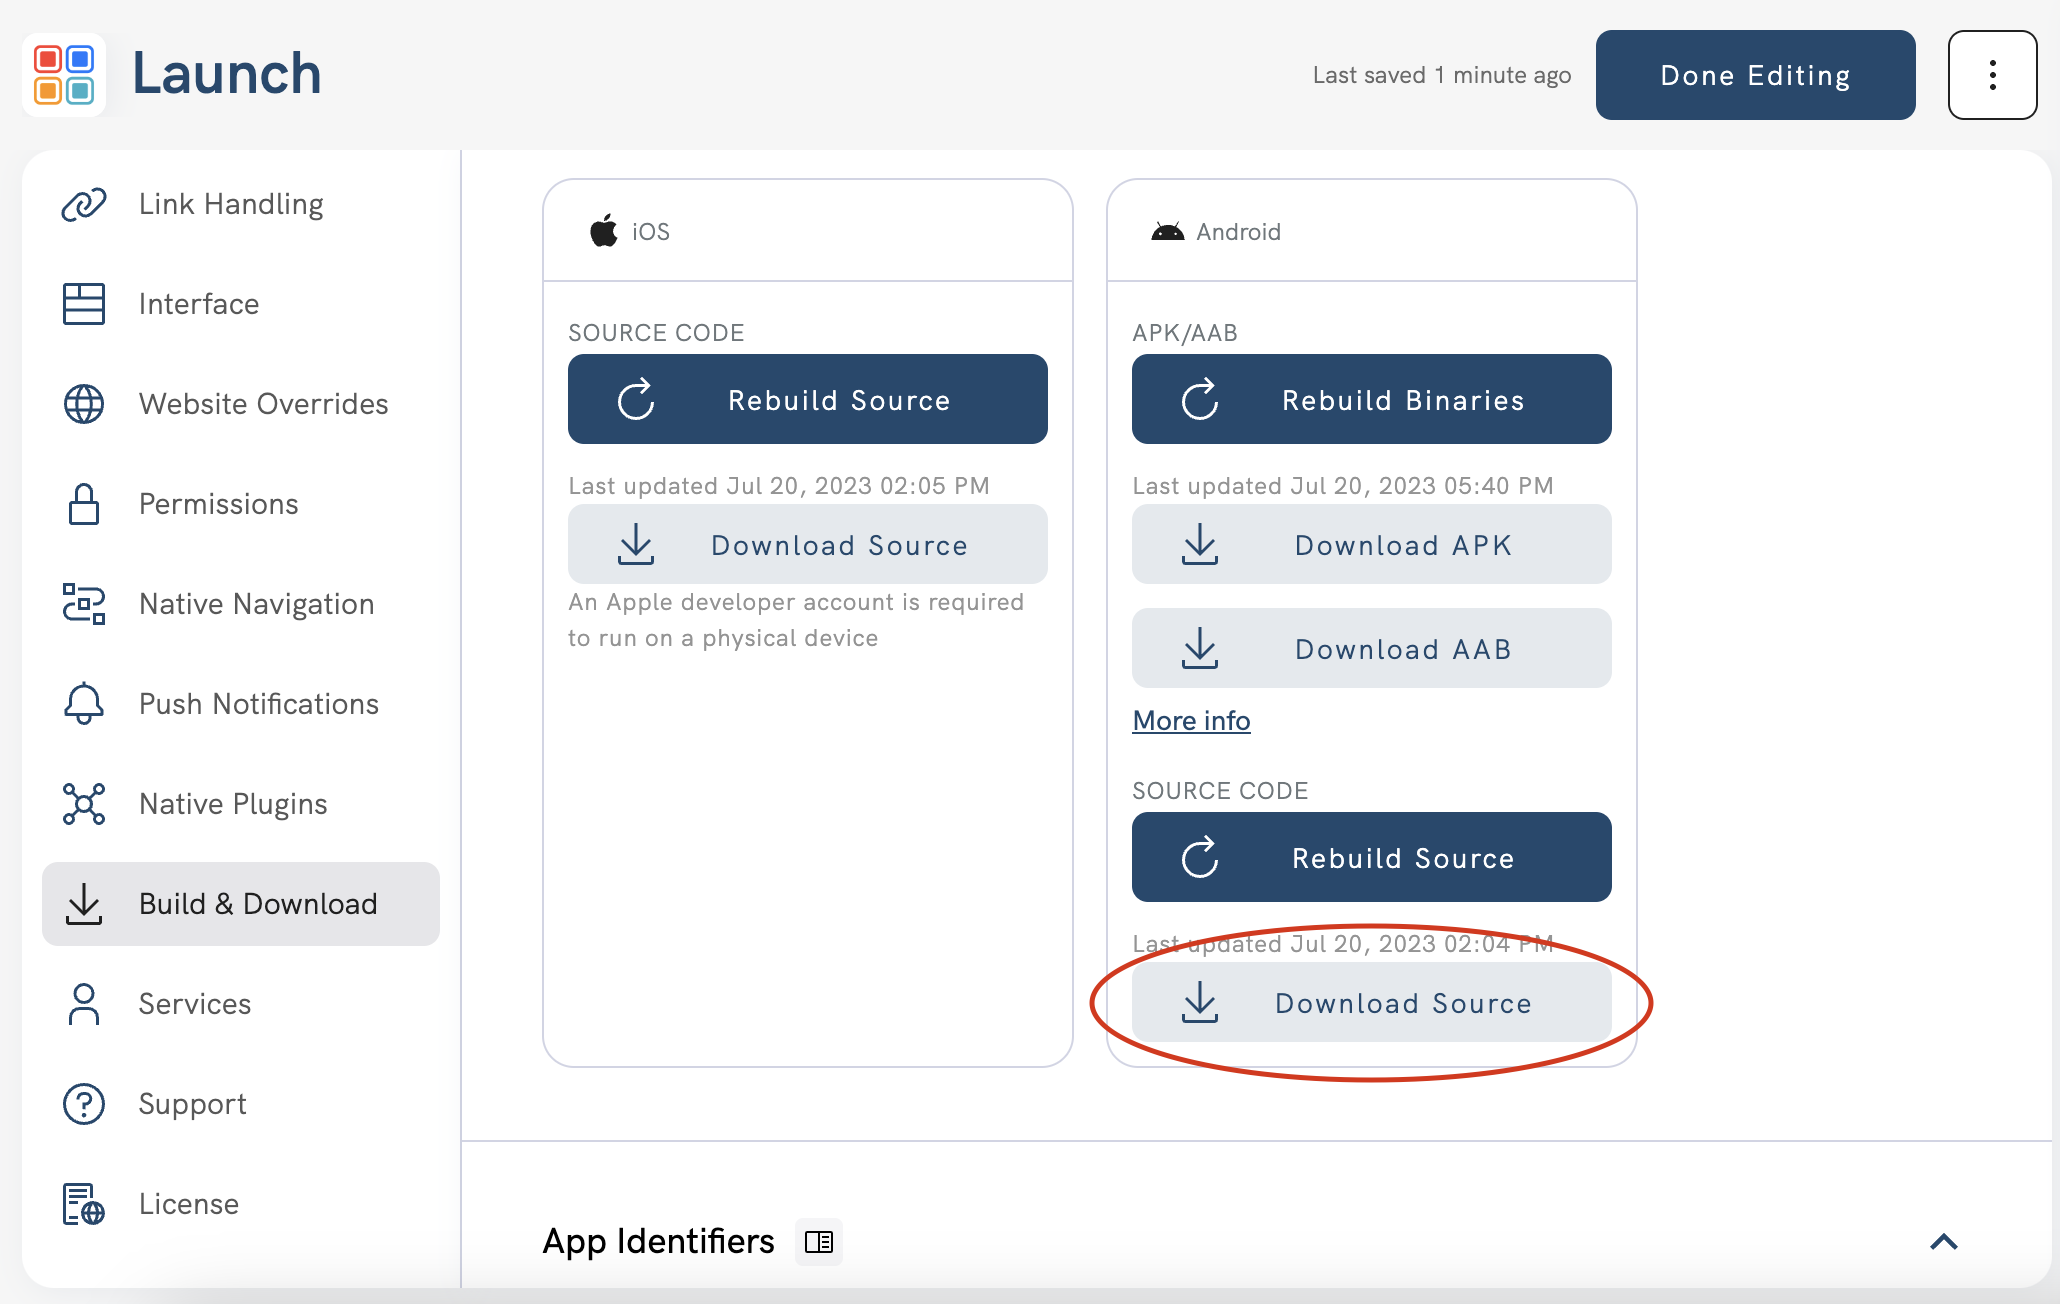
Figure 1
Extract the android_source.tar.gz file
android_source.tar.gz fileExtract the downloaded android_source.tar.gz file and open your app using one of the following methods.
- Double click the
android_source.tar.gzfile within Windows Explorer or the MacOS Finder application. - Open command prompt or terminal session and run the command
tar -xzvf android_source.tar.gz
Using tar command
The
tarcommand in method #2 requires Windows 10 (or MacOS). It will extract the files to a subdirectory named “android”. If there is an existing directory with the same name it will be overwritten.
Once extracted, open the extracted directory and you will see files similar to Figure 2:

Figure 2
Open project in Android Studio
Open Android Studio and click the “Open” button as seen in Figure 3 to open your app.
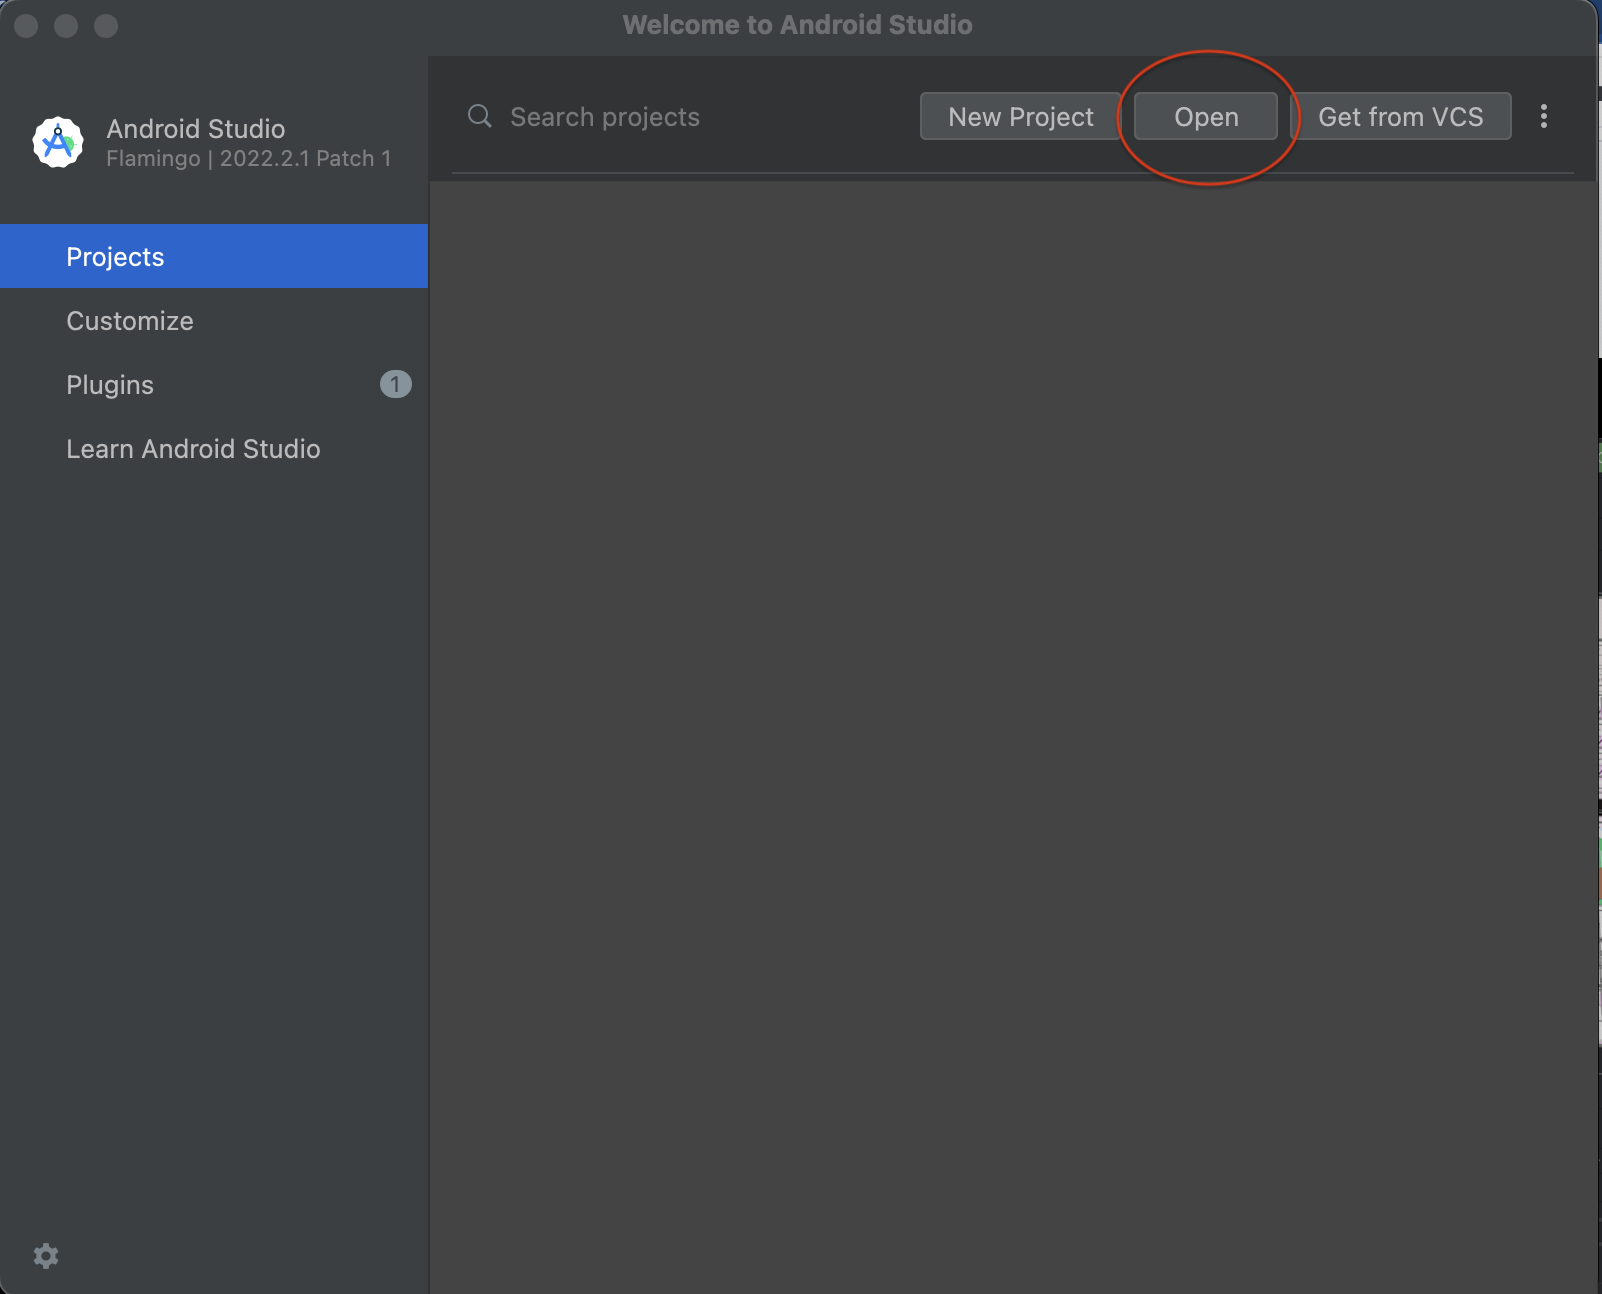
Figure 3
Now, navigate and select the extracted directory and click “Open”.
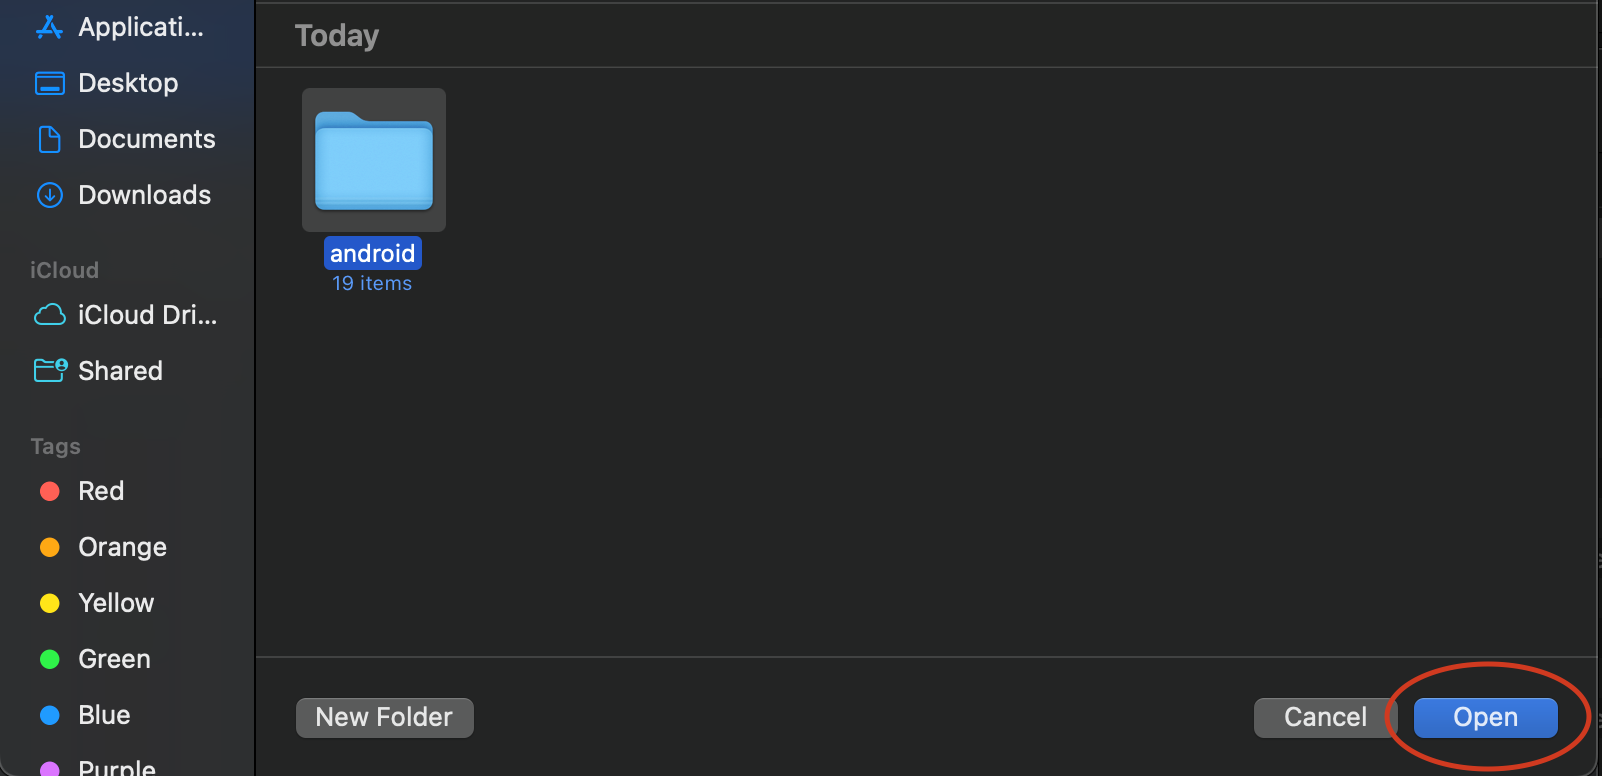
Figure 4
Next, Android Studio will ask you whether to open your project in Safe mode or to trust the project. To build/run/debug your app without restrictions, select “Trust Project”.
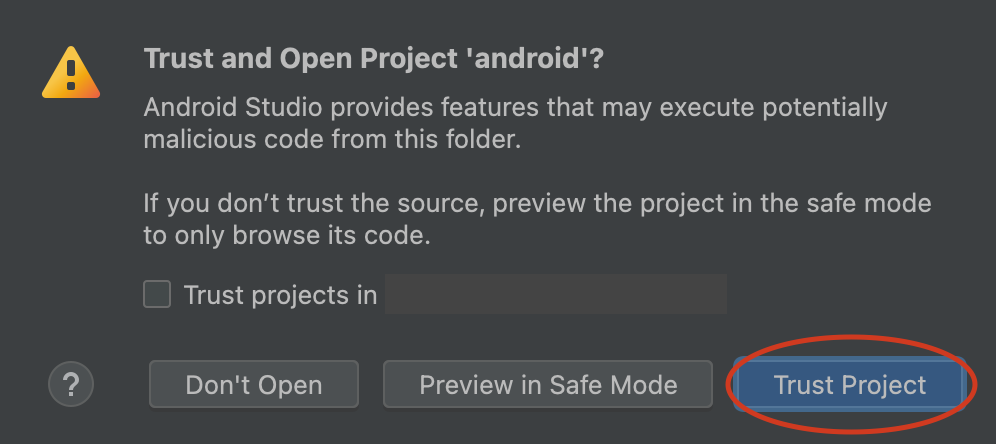
Figure 5
Run/Debug App
Wait for Android Studio to initialize the project, and once finished you will see BUILD SUCCESSFUL in the Build Output panel as seen in Figure 6:
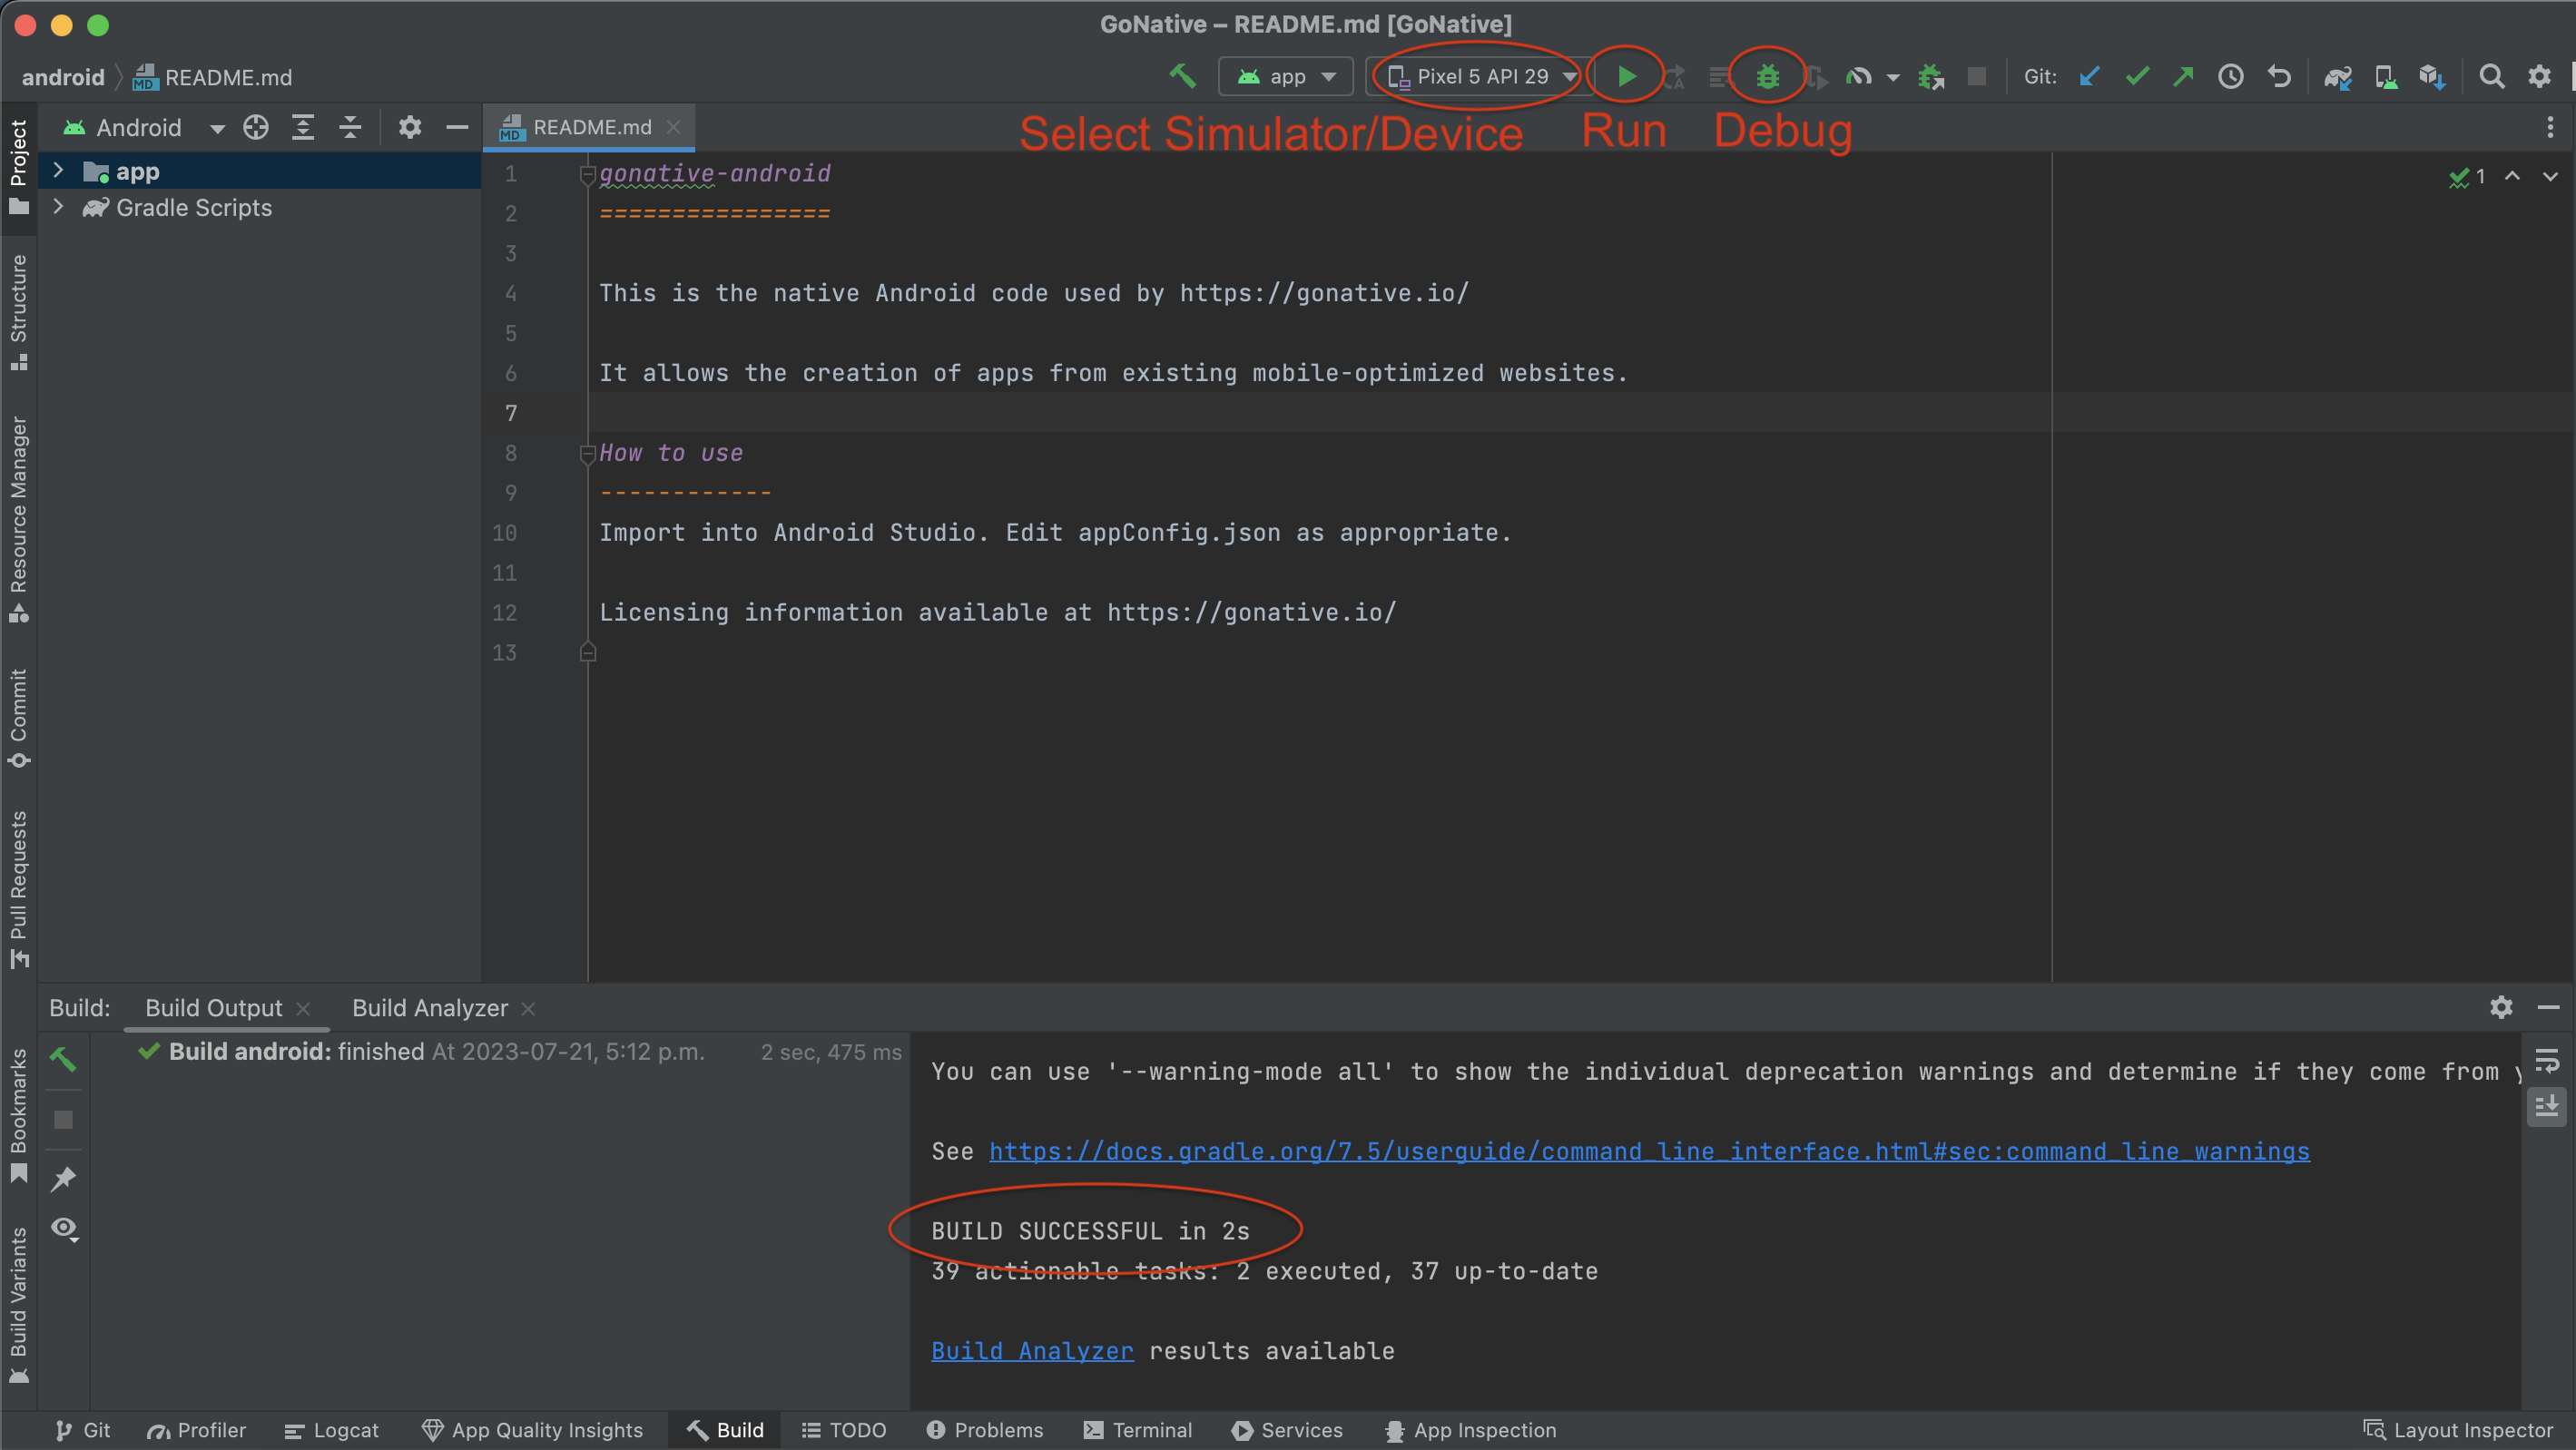
Figure 6
Now, as seen in Figure 6, select a simulator device or connect a physical Android device to your computer and select your device in the drop down menu.
To run your application, click the run icon and the Android Studio will build, install and run your application in the selected simulator/device.
To debug your application, click the debug icon.
Generate Signed Bundle / APK
To create a signed bundle or apk for publishing to Play Store, you will need a keystore file, generally named release.keystore, that you will use to sign your bundle or apk.
If you would like to use the same keystore that we use for build through our website, please first purchase a license and then contact us.
Once you have your keystore, in Android Studio, select Build → Generate Signed Bundle / APK.
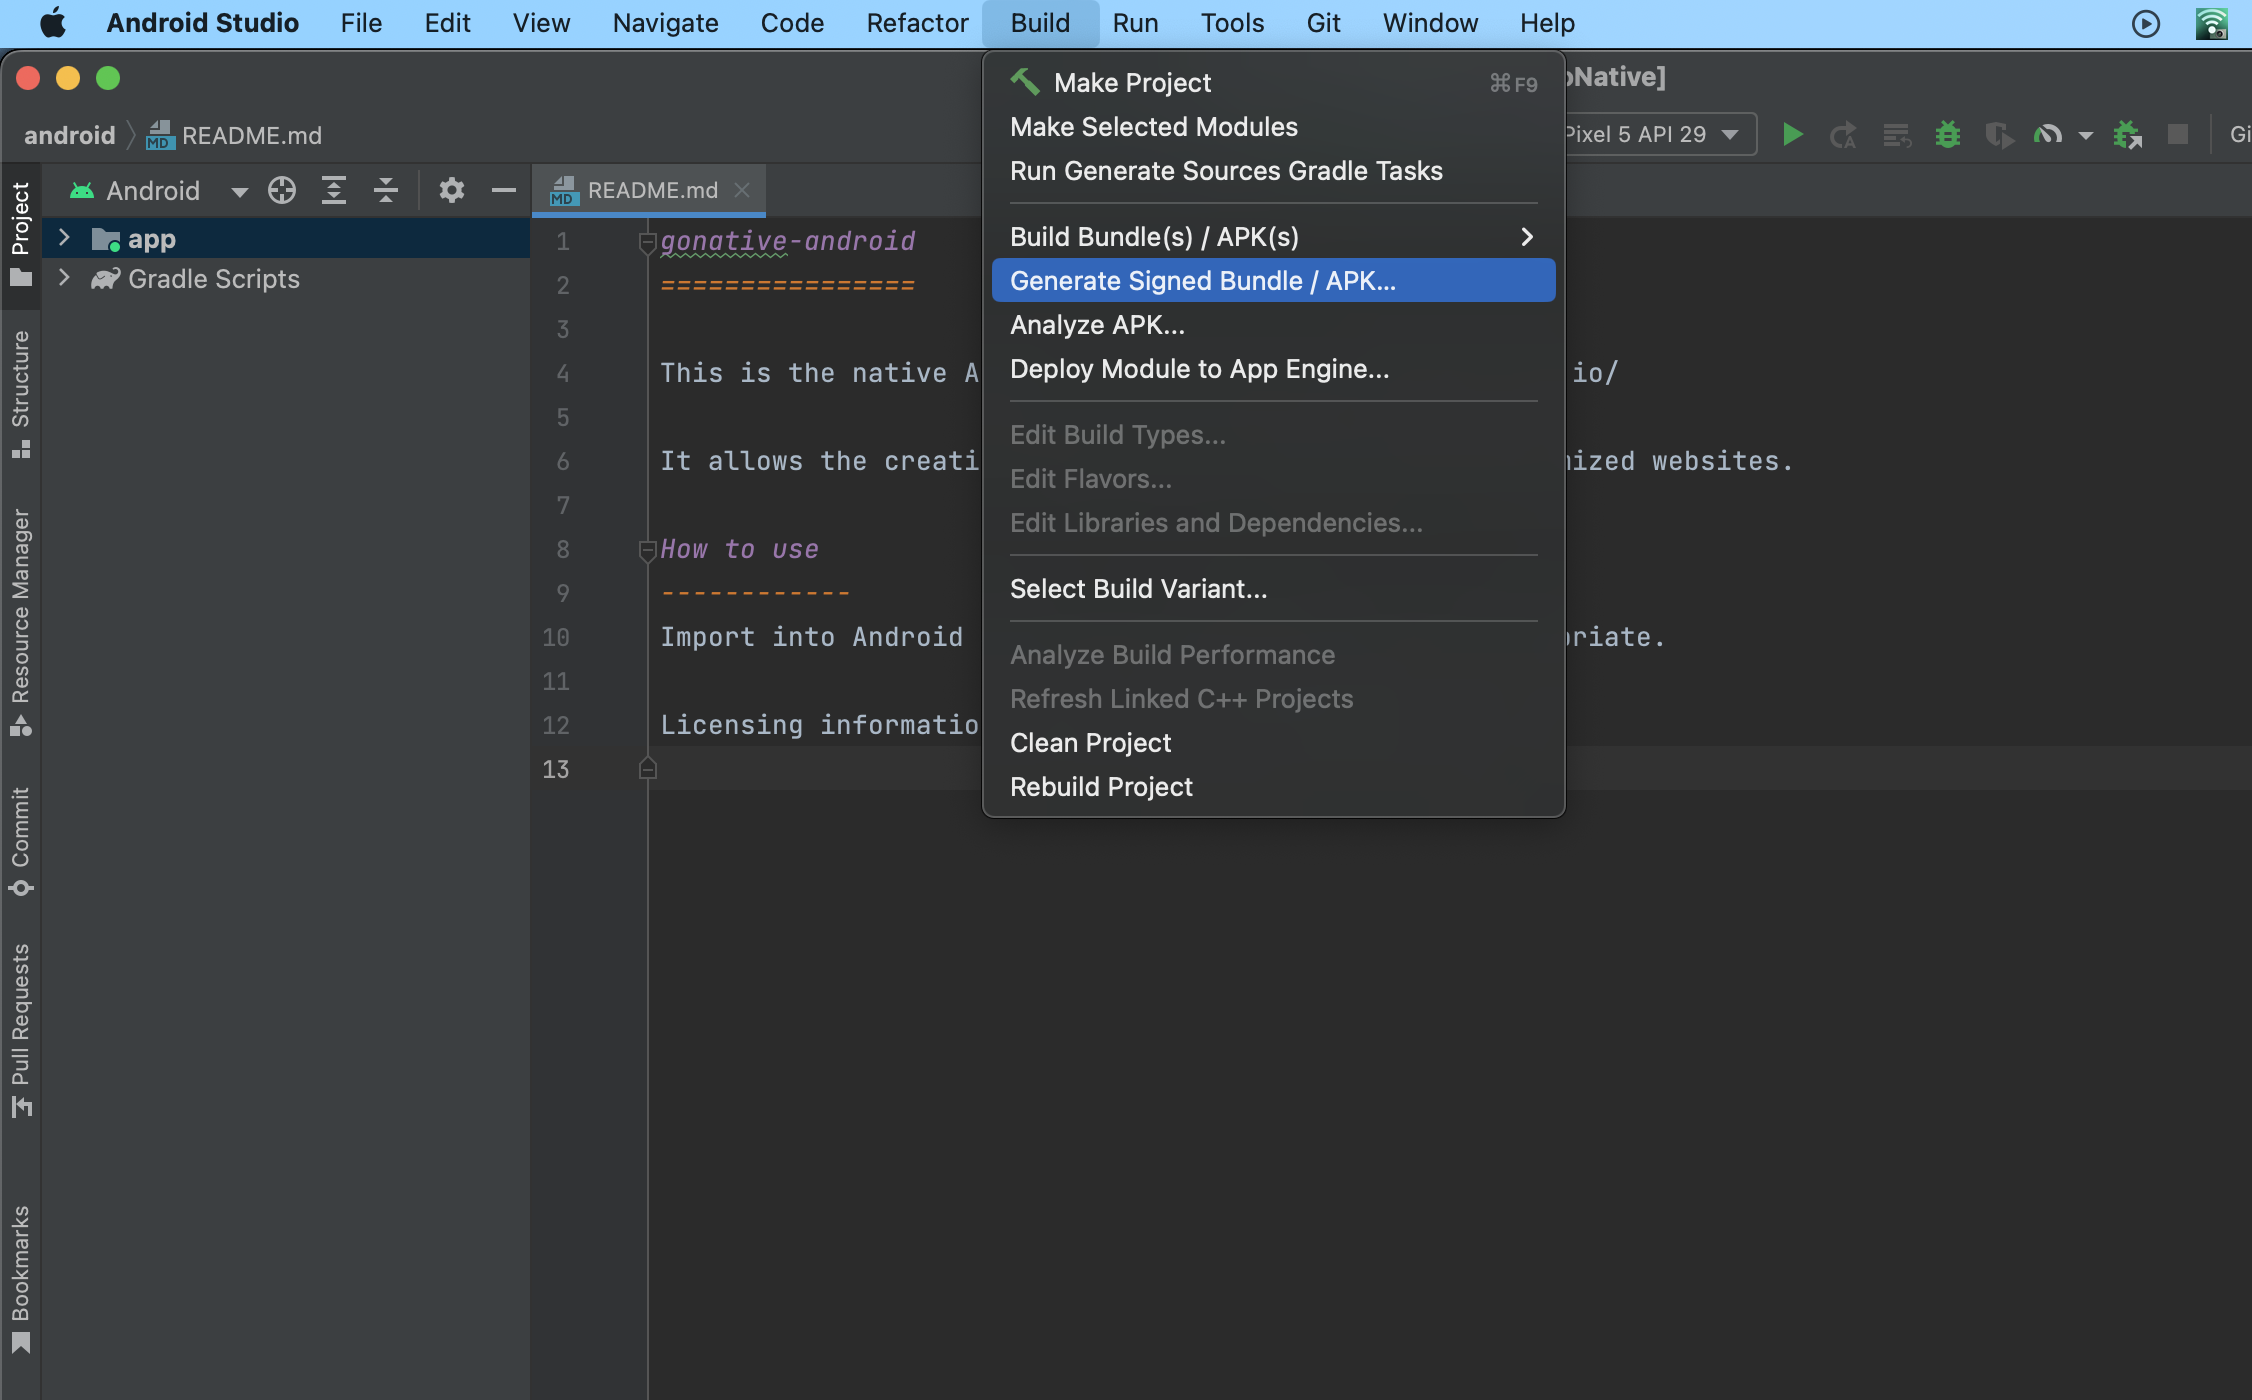
Figure 7
Select Android App Bundle or APK and click “Next”.
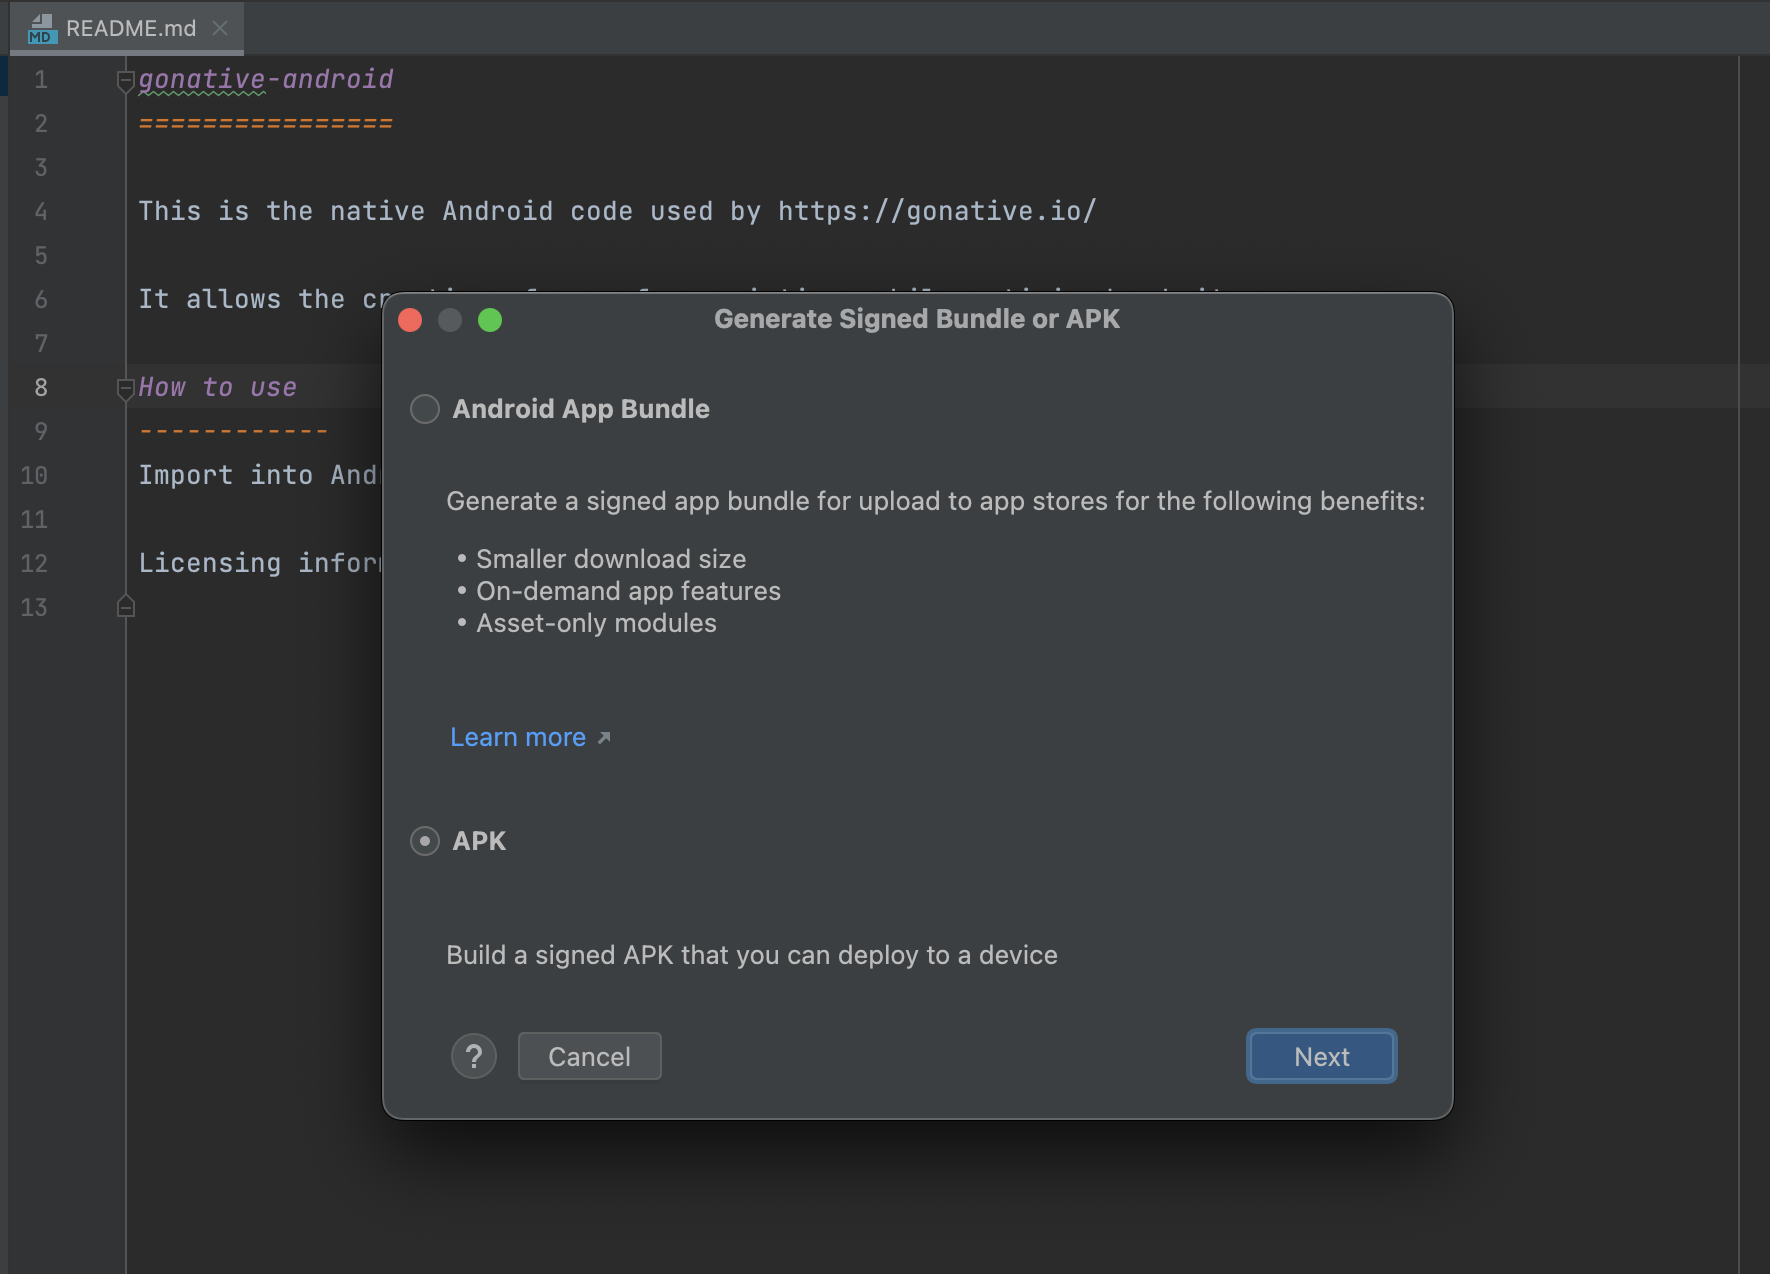
Figure 8
As seen in Figure 9, you will be asked to provide the path of your keystore file and the credentials attached to it.
If you are using Median provided keystore, use the below credentials:
Keystore password: password
Key alias: release
Key password: password
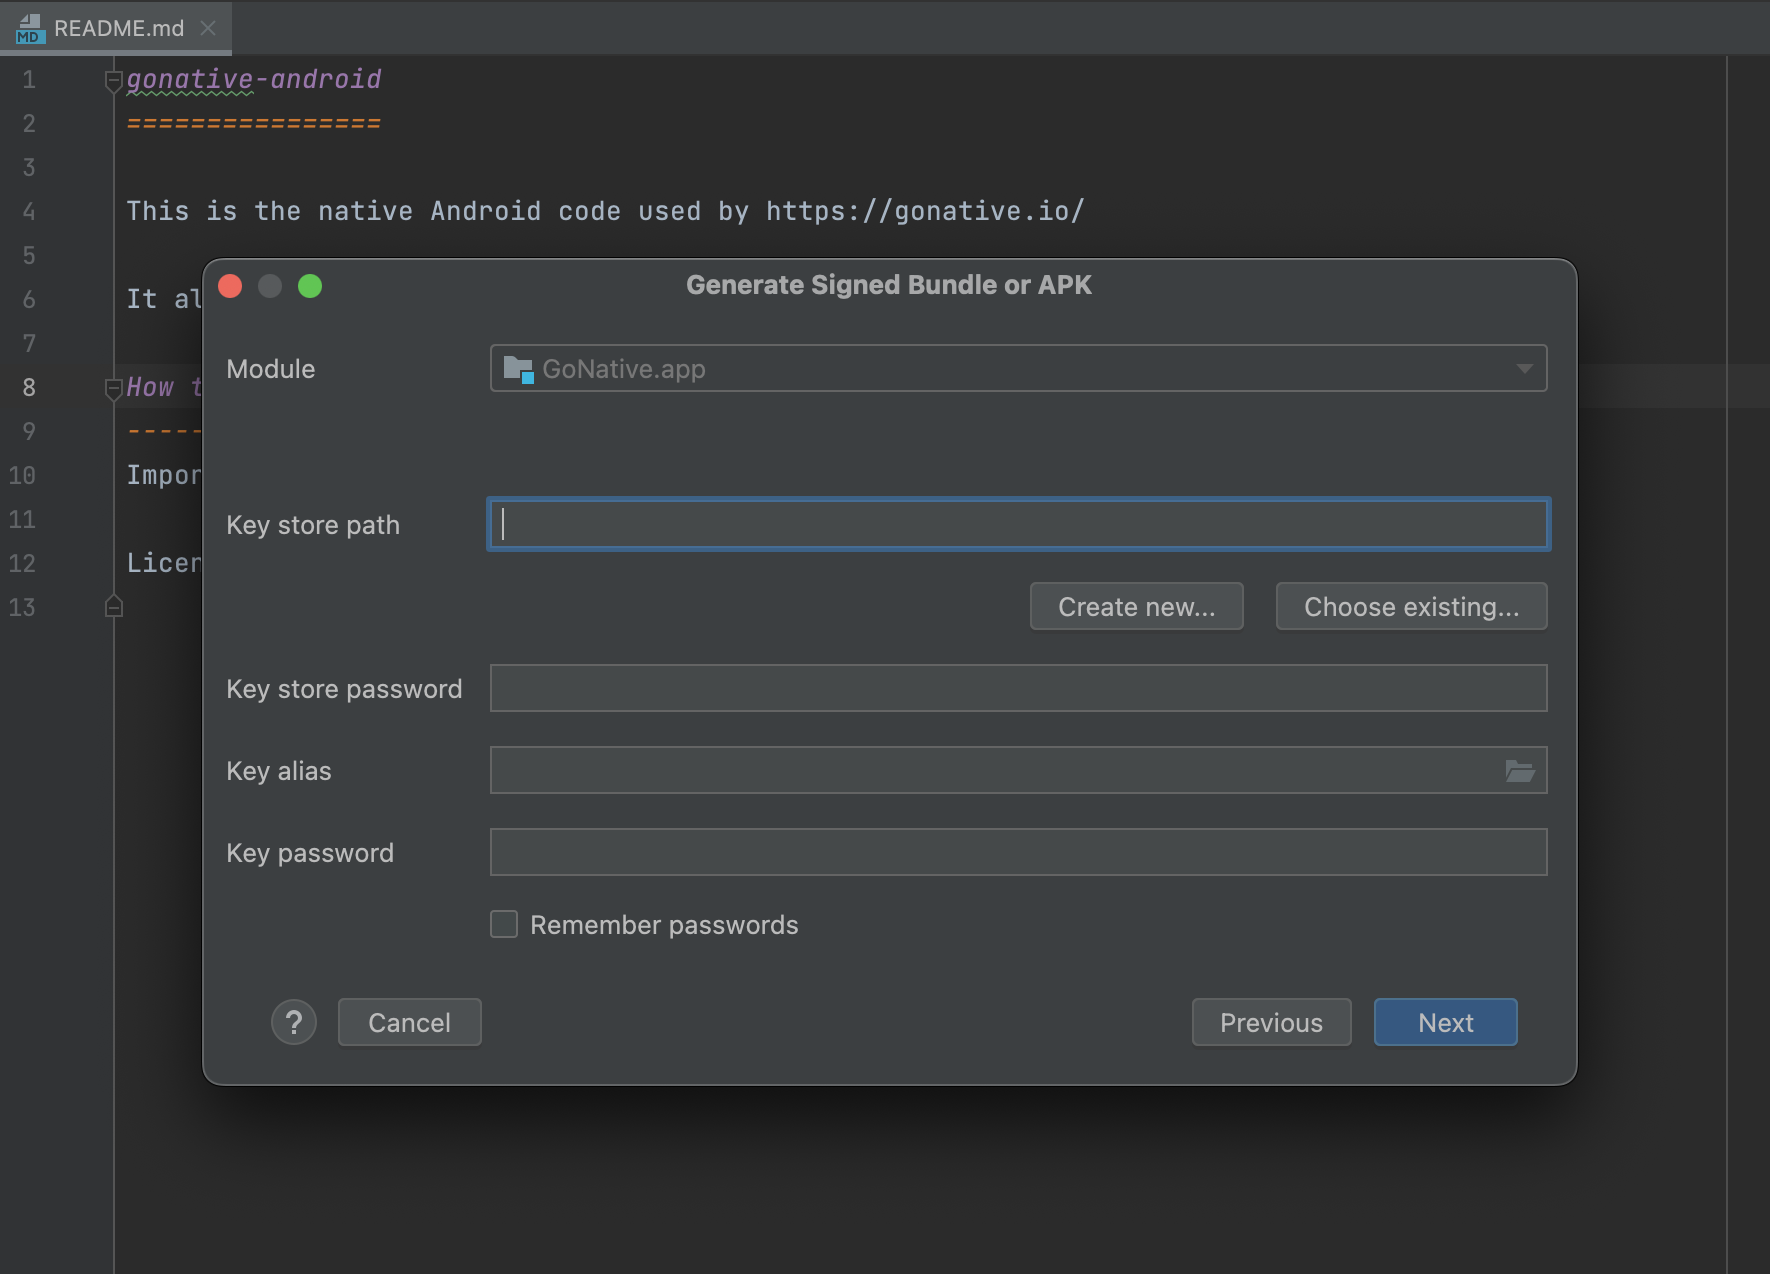
Figure 9
Once you have entered the keystore parameters, click “Next”.
As shown in Figure 10, provide the destination path of your generated Bundle / APK, select normalRelease and click “Create”.
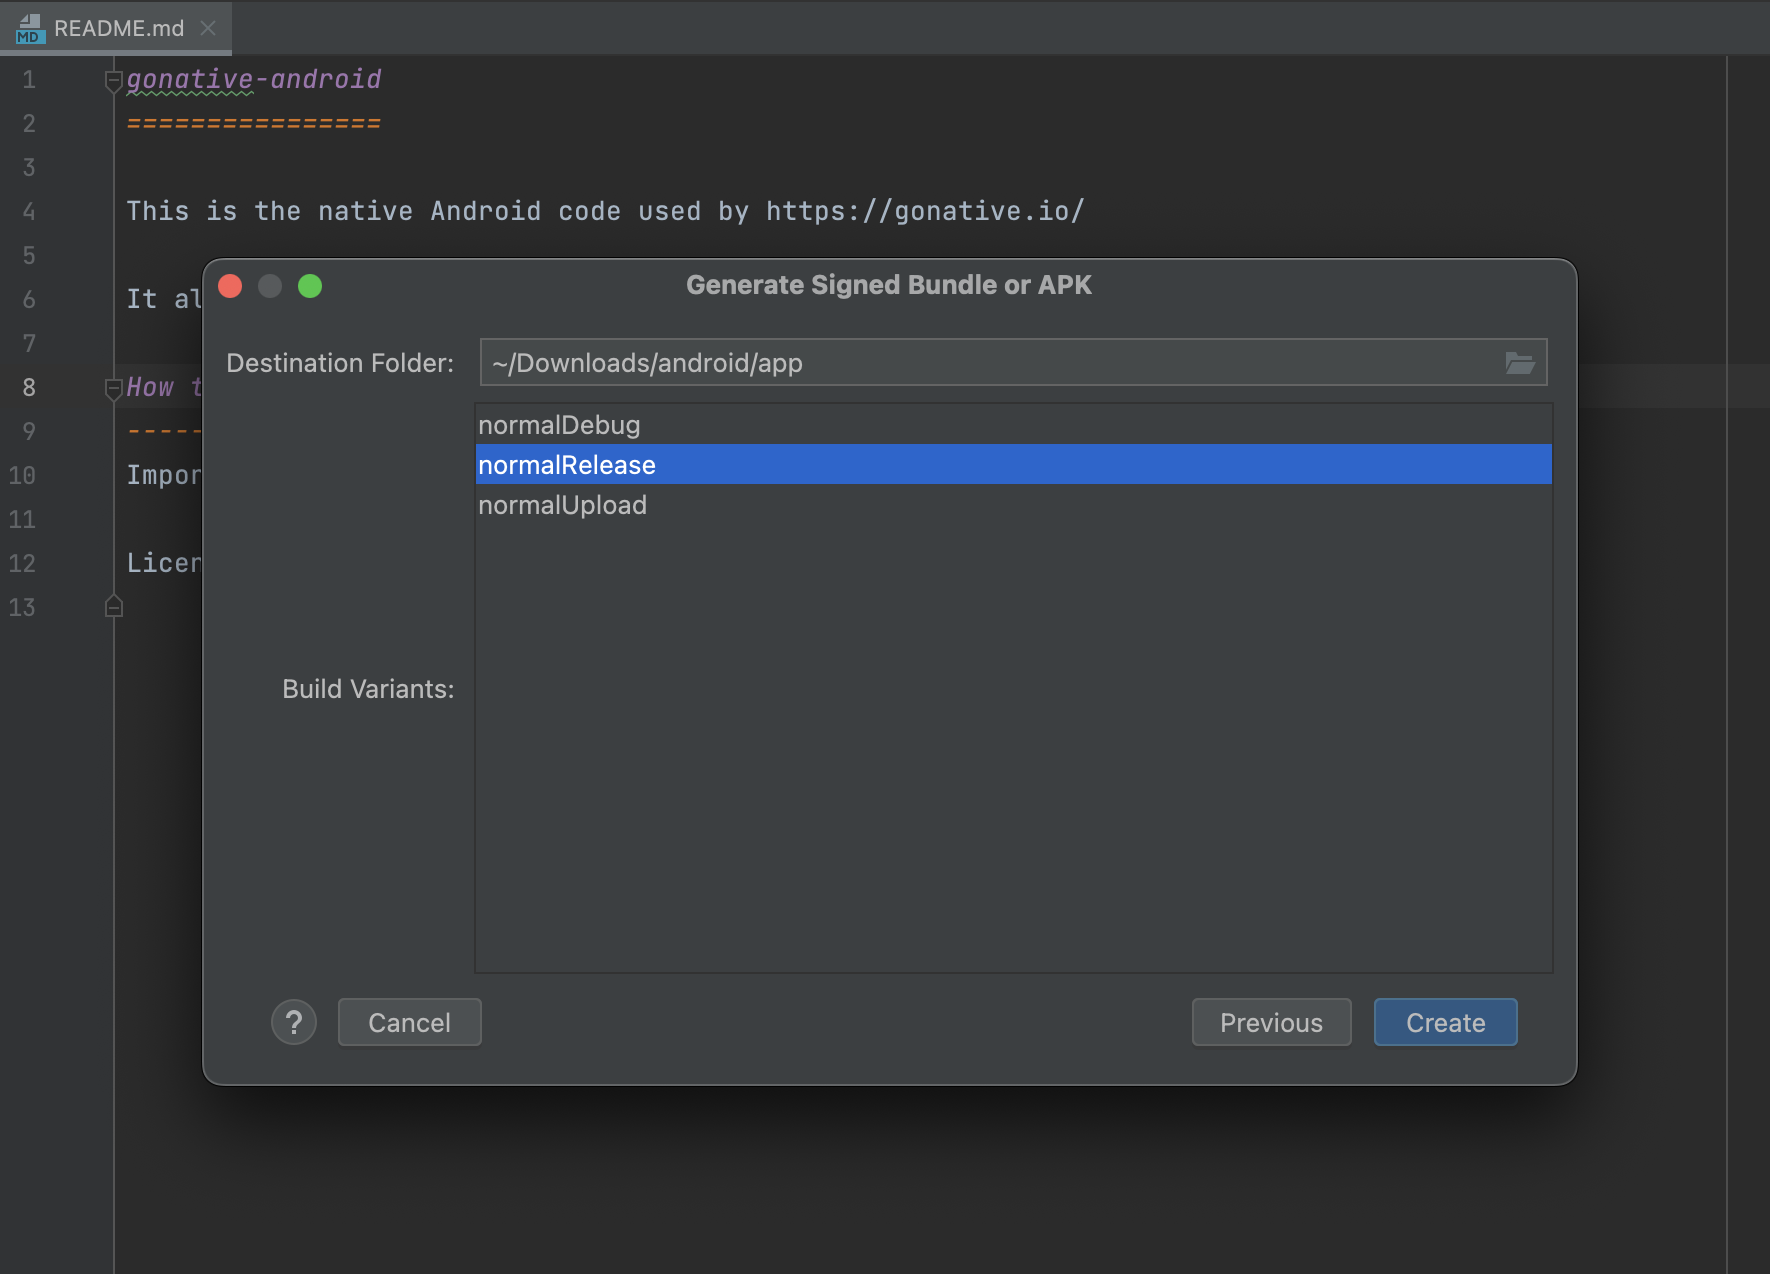
Figure 10
Once Android Studio has finished building the requested file, you will see a success notification at the bottom right corner of Android Studio with a locate button, as seen in Figure 11, this link will directly open the directory containing your generated file as shown in Figure 12.
Alternatively, navigate to the <destination_directory>/normal/release directory to see your generated file.
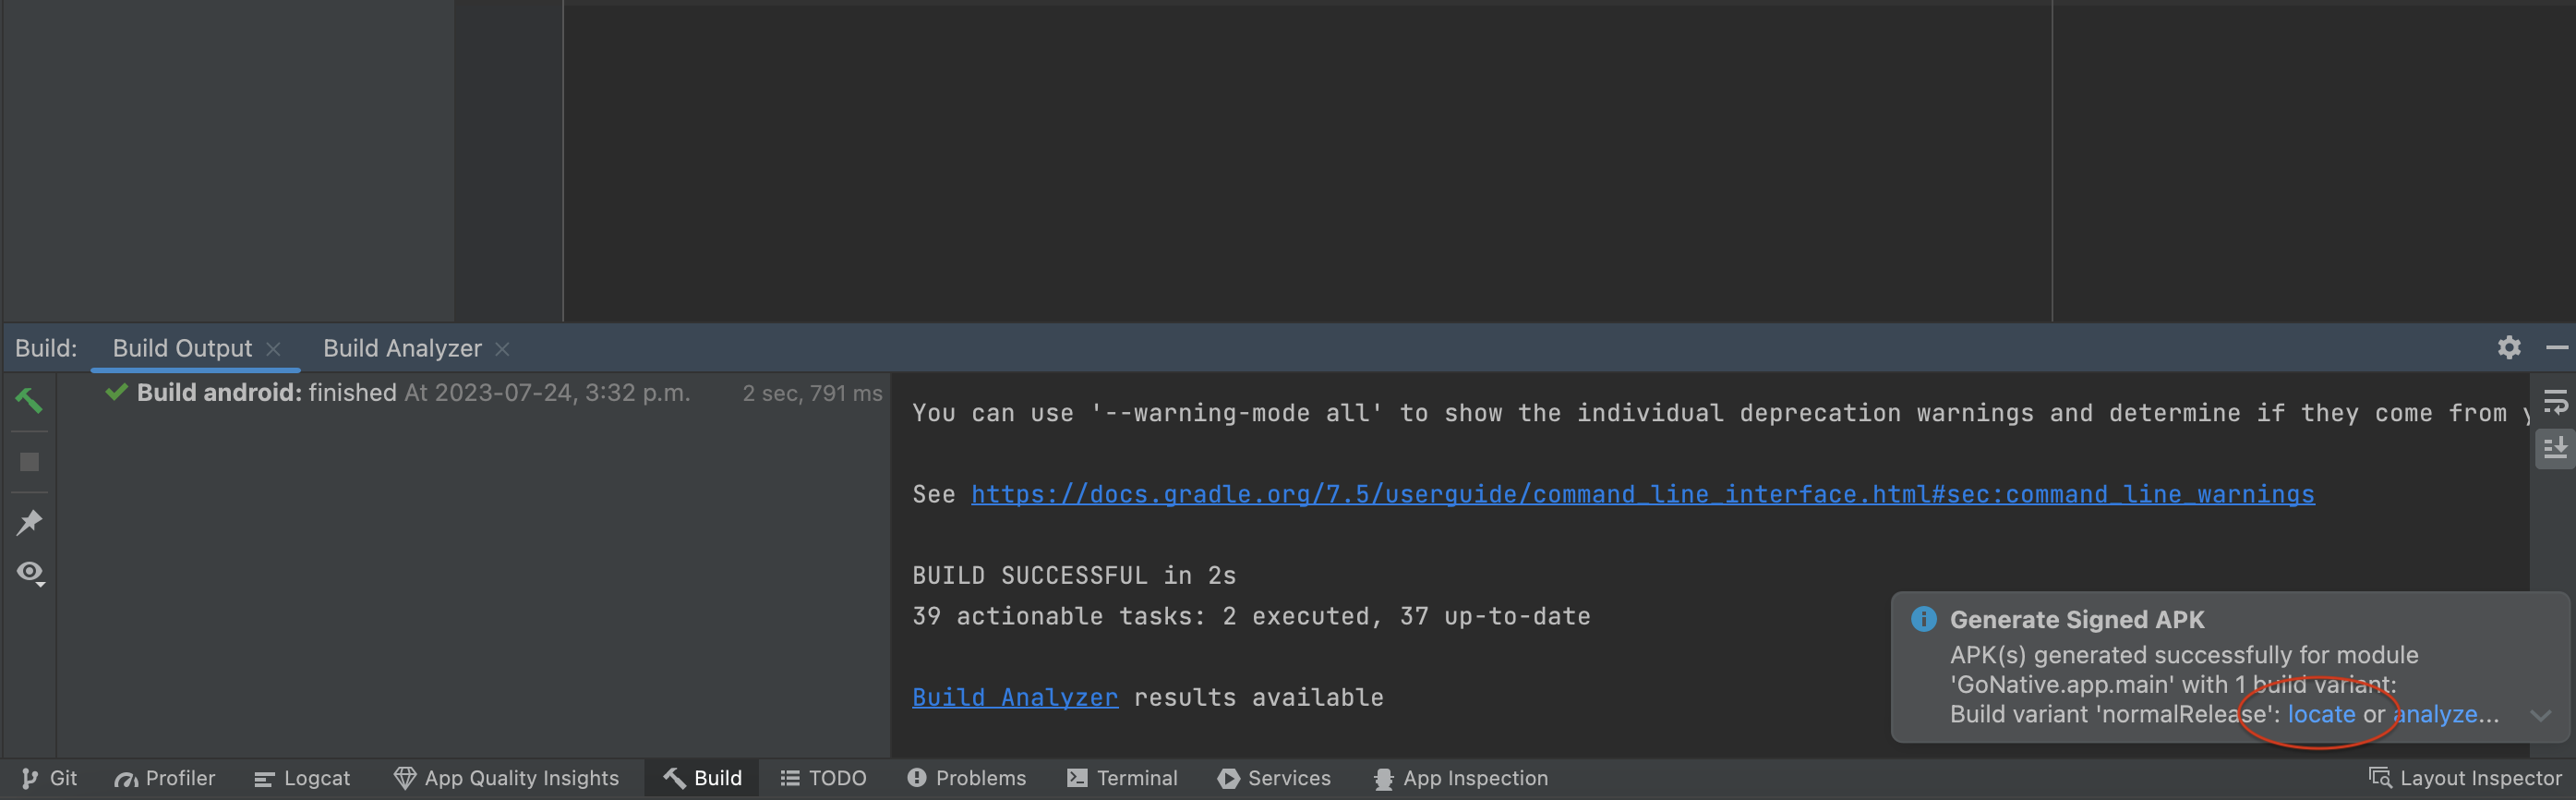
Figure 11
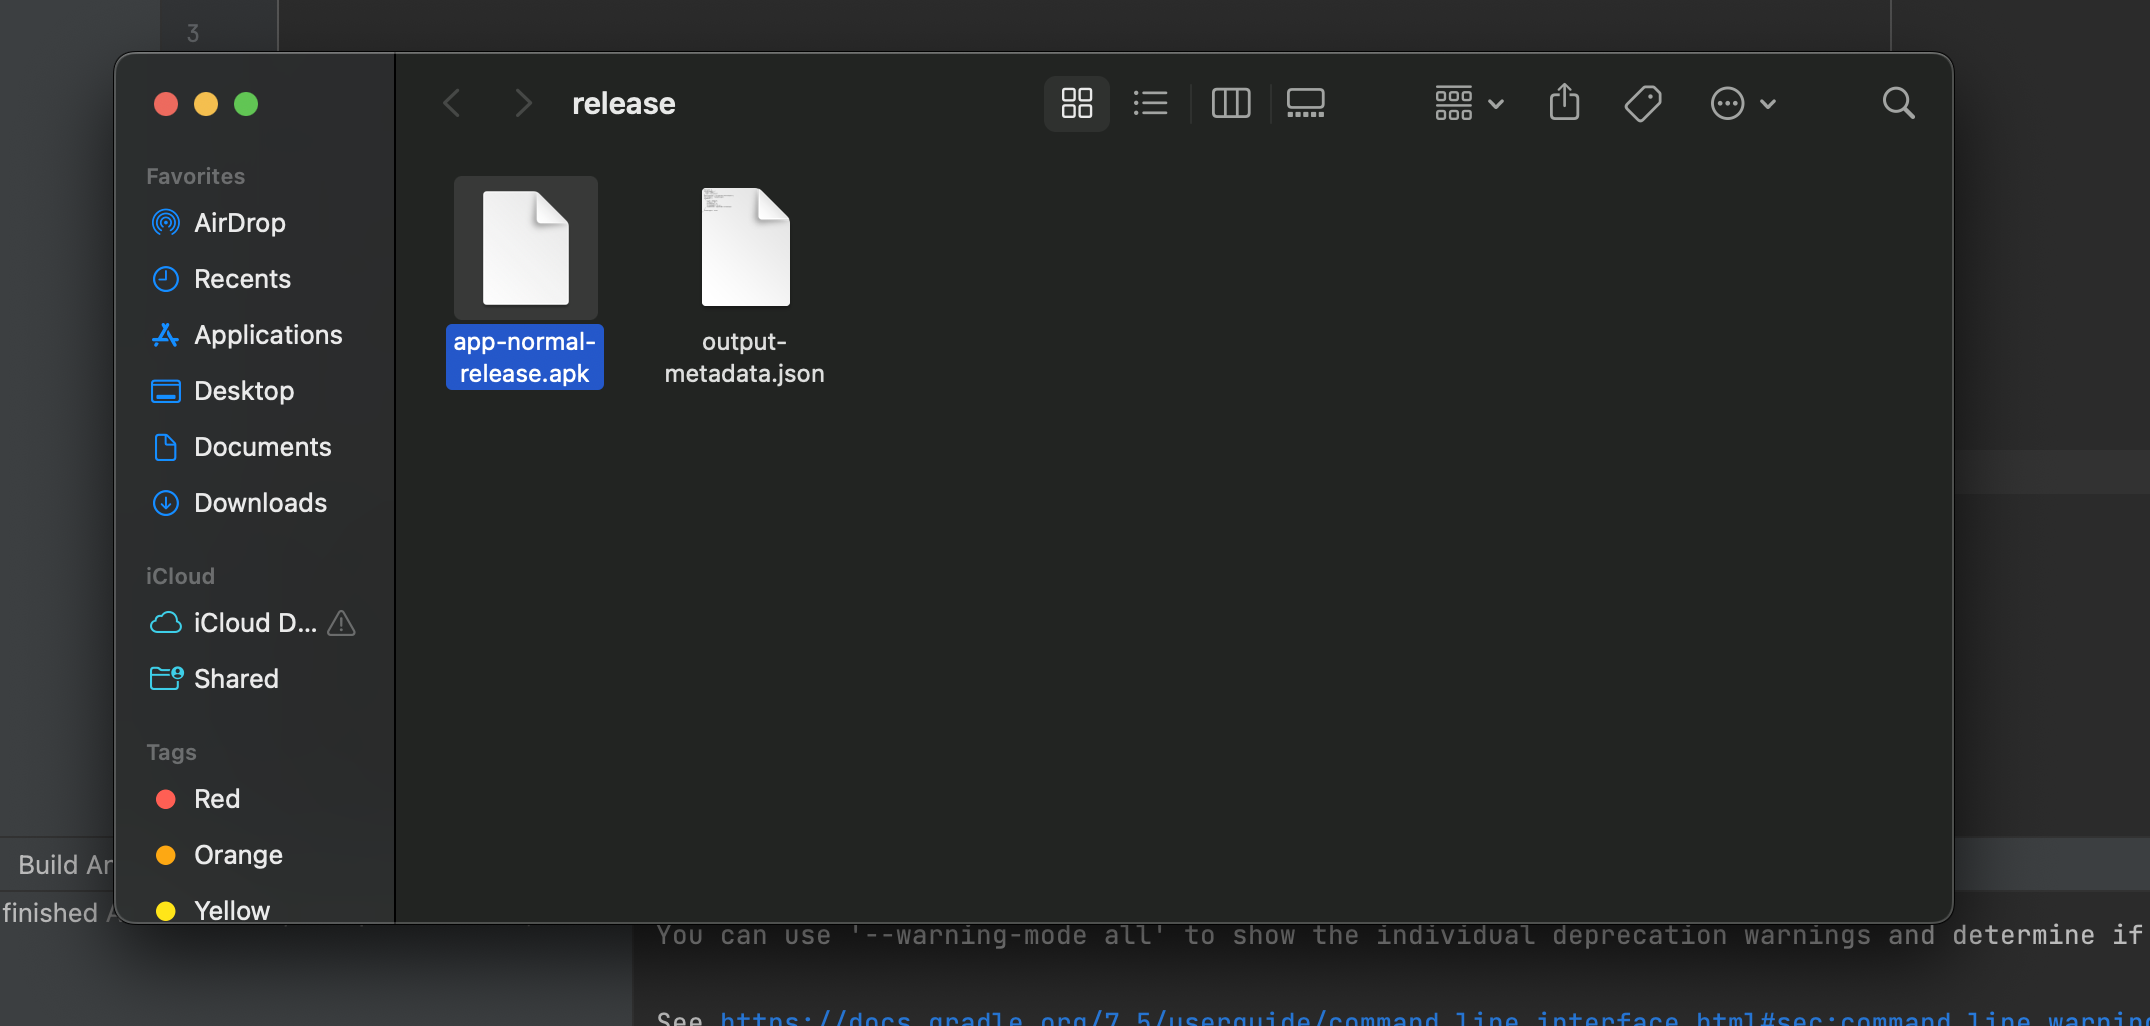
Figure 12
Updated 5 months ago