Bubble Plugin
Easily access native app functionality from your Bubble app using the Median JavaScript Bridge
Median JavaScript Bridge Plugin on Bubble
Setup
To get started, install the Median Bubble Plugin in the Bubble app editor via Plugins -> Add Plugins -> Median Plugin.
Drag the "Median Plugin" element from the "Elements" section and drop it on the page that requires access to Median JavaScript Bridge. The purpose of this element is to initialize the Median JavaScript Bridge Library so that commands can be executed on page load as shown in the following section.
Execute command on page load
To execute a Median JavaScript Bridge command on page load, click the "Median Plugin" element that you just dropped on the page and insert your desired JavaScript into the text input captioned "Median Library Ready Custom Script" as shown below:
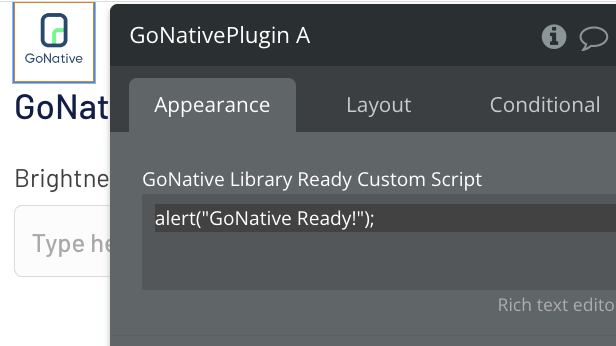
Median On Page Load JavaScript
Execute command as a workflow/action
Suppose we need to set brightness of the device to 80% when user clicks a button. To accomplish this, drag a button from the "Elements" section on your page and change its name to "Set Brightness" or as desired:
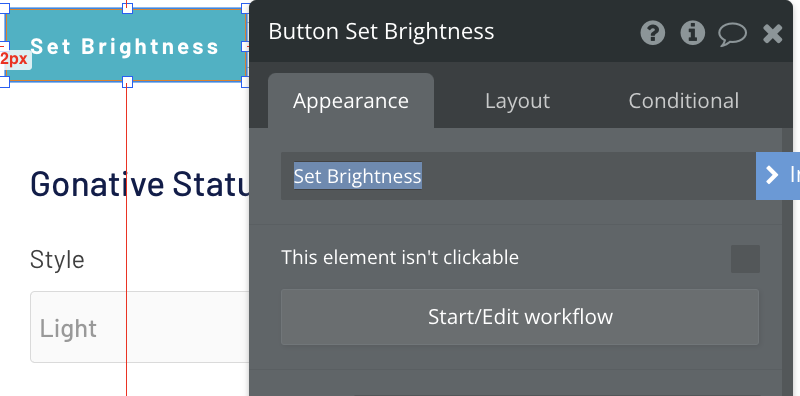
Create a Button
Once the button is created, click "Start/Edit workflow" and you will see the following page:
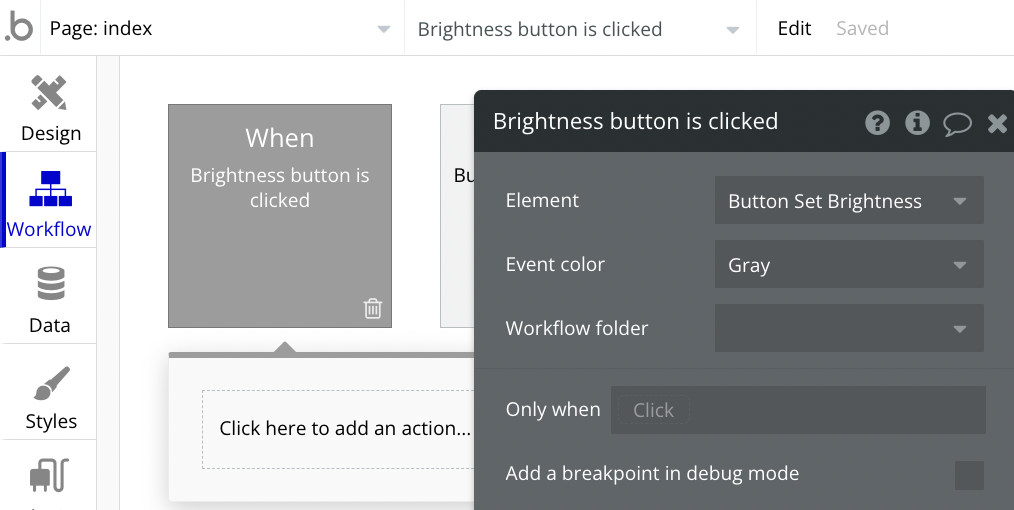
Creating new Workflow
To assign a Median JavaScript Bridge command to the click event of this button, click on "Click here to add an action" to view the list of various actions. Select Plugins -> Median Screen Brightness as shown below:
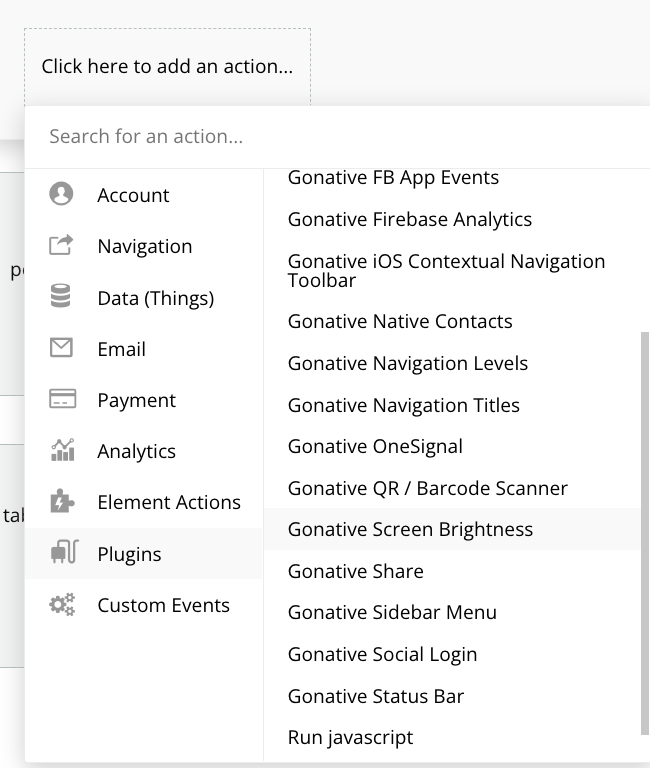
Select action
The final step in configuring a workflow/action is to modify the action as required. In our case, we will set the Brightness value to 0.8 and set the "Restore on navigation" field to "no" as shown below:
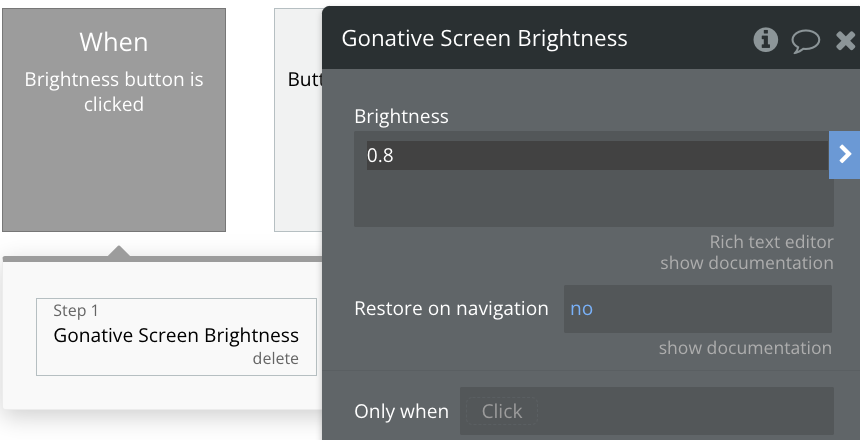
Set Brightness
When a user clicks this button within your app, the Median Bubble plugin will run the corresponding Median JavaScript command and set the screen brightness to 80%.
Dynamic value
You can also assign a dynamic value to the brightness field so that it takes the value of an element as its input.
The dynamic value can be a text input, a slider, or any one of the elements from which a value can be read. For instance, to set the dynamic value as a slider value, drag and drop a "Slider Input" element from the "Elements" section to your page. Since the acceptable brightness values in Median apps is between 0 and 1, set the min and max values of the slider element to 0 and 1 respectively and set the "Step" to 0.1 as shown below:
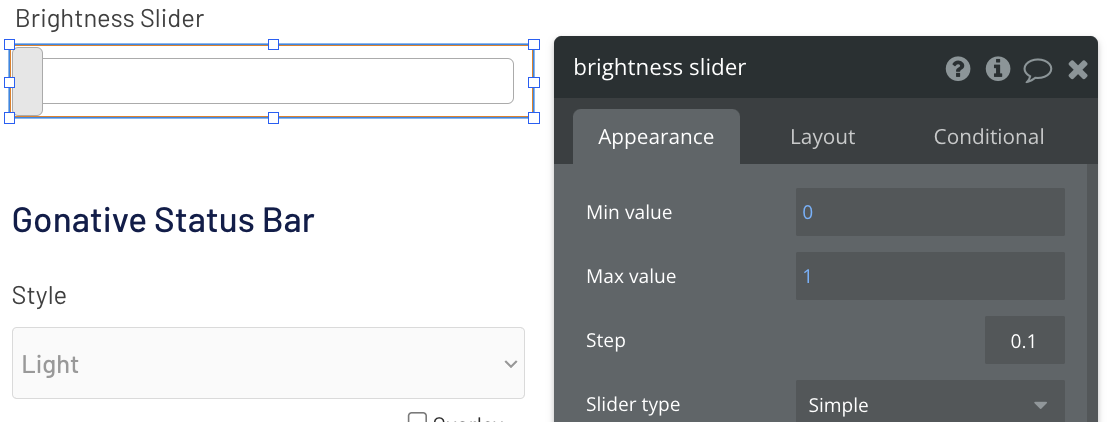
Slider config
Once the Slider Input element is configured, go to the "Workflow" section and create a new event to trigger when your slider's value is changed. Choose the "An input's value is changed" option and then select your slider element:
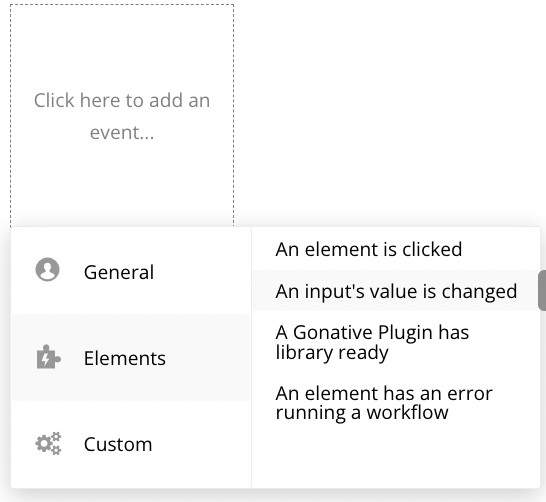
Slider value changed event
Now add an action to the slider and select Plugins -> Median Screen Brightness. If you click on the "Brightness" field, you will see the option "Insert dynamic data" as shown below:
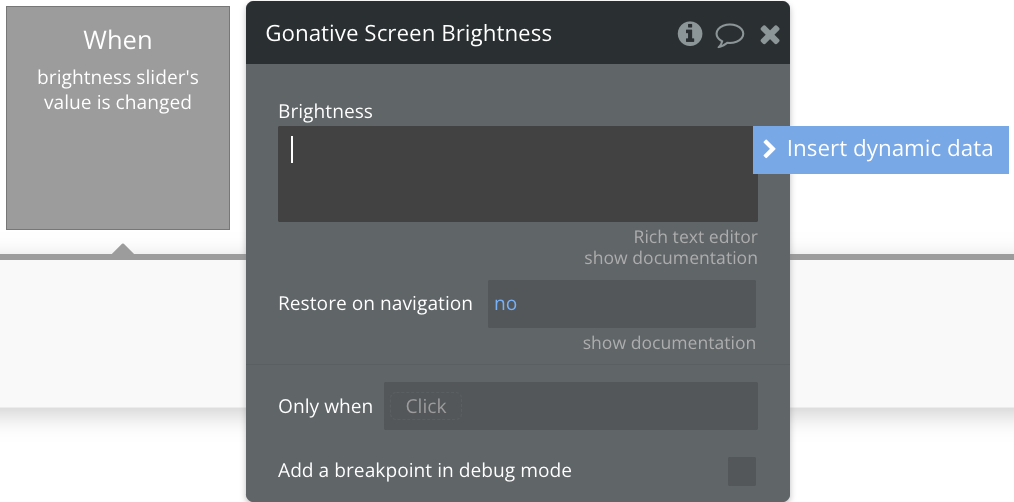
Slider Dynamic Data
After clicking the option, you will see a list of all elements that you have in your page. Select your slider element and then choose "This SliderInput's value" to read the element's value.
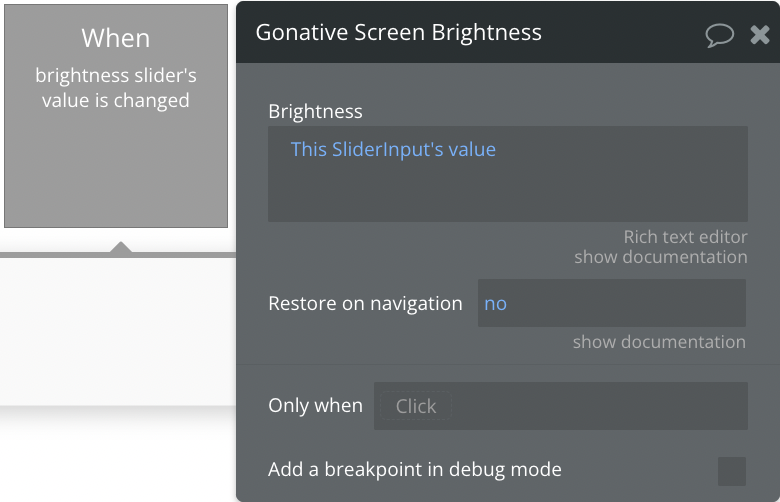
Slider Action
Once this action is configured, your app will read the brightness value from the slider input when setting the brightness level.
Execute custom JavaScript
To access advanced Median JavaScript Bridge functions in a custom script, you can use any plugin that enables JavaScript execution. For instance, you can run any Median JavaScript commands via the “Toolbox plugin” which allows you to run JavaScript as a workflow.
Once the plugin is installed, select an element and click "Start/Edit workflow". Create an action and choose Plugins -> Run JavaScript and add your desired JavaScript to run as shown below:
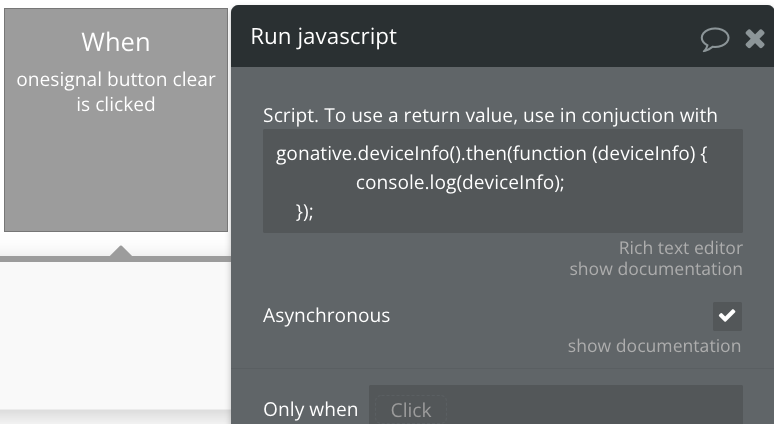
Toolbox JavaScript
This plugin can also be used to run AJAX HTTP requests to send data returned from your app via the JavaScript Bridge to your servers or request data from your servers to pass it to your app via the JavaScript Bridge.
Process returned data
Returned data variable
All the data that Median returns from the app can be accessed in your custom callback script by the variable named "data".
For example:
document.getElementById("contacts_output").value = JSON.stringify(data);
Some Median JavaScript commands return data from the device. For example, the Native Contacts Plugin function to retrieve contacts from the user's address book: median.contacts.getAll(). This function returns a JSON object containing the user's contact list that you can send to your server via AJAX calls OR pass it to one of the Bubble's elements such as the "Multiline Input" as seen in the following example.
First, you will need to enable the ID Attribute in your elements by going to Settings -> General and check the option "Expose the option to add an ID attribute to HTML elements". Now, drag the multiline input element to your page, double-click it and set its ID Attribute (at the very bottom) to a unique string (such as contacts_output).
Note: Since this ID Attribute will be used to identify a unique element in a given page, it has to be a unique string.
Once complete, go to your Workflow section, then open the "Median Native Contacts" action you want to read the data from, and paste the custom callback script as shown below. Replace contacts_output with the ID Attribute of your multiline input element. This script will set the value of the element with the ID Attribute contacts_output (in our case, the Multiline Input) to the "stringified" JSON object that the Native Contacts Plugin returned.
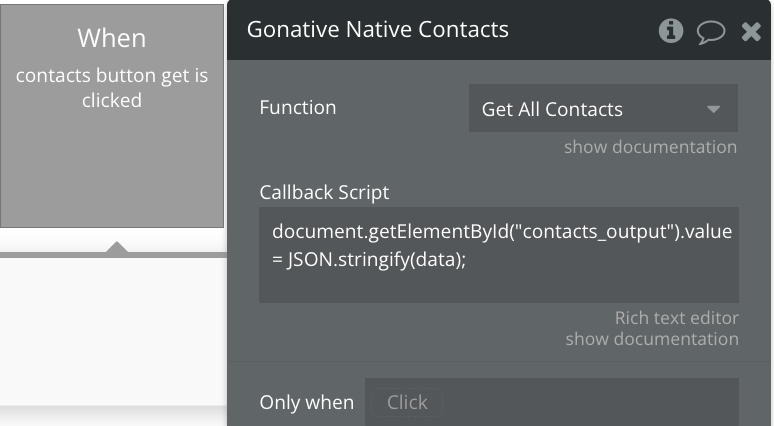
Median Native Contacts - ID Attribute
Supported commands
The following JavaScript Bridge commands are supported within the Bubble plugin via drag-and-drop actions:
- Set Screen Brightness
- Set Status Bar
- Download file / image
- Share Page
- QR / Barcode Scanner
- Device Info
- Set Navigation Titles
- Set Sidebar Items
- Set Tab bar Items
- Set Navigation Levels
- OneSignal Info and Set / Remove External User ID
- OneSignal Show Tags UI
- Native Contacts
- Firebase Analytics - Set User and Log Events
- Send Facebook Events
- iOS ATT consent Request / Get Status
- Show/Hide iOS Contextual Navigation Toolbar
- Social Login Server-side Redirect functions
- Social Login JavaScript Callback functions
Updated 5 months ago